A Practical In-Studio Pixel Shift Comparison
400MP, 240MP, 100MP, and 61MP Compared

The pursuit of fidelity
In high-end product and archival photography, folks are constantly chasing the “perfect” file. One with absolute color accuracy, zero digital artifacts, and enough resolution for any application. While high-resolution sensors like the 61MP Sony a7R IV and the 102MP Fuji GFX 100 II are impressive on their own, Pixel Shift technology promises to push them even further by capturing data that a single exposure simply cannot.
The goal of this article is to go beyond marketing specs and offer a practical, non-technical look at how pixel shift works in the studio with strobes, since much of the high-end product and archival photography is done with flash.
Pixel shift refresher
Standard digital sensors use a Bayer filter to capture color, where each pixel “sees” only one color (Red, Green, or Blue) and “guesses” the others through a mathematical process called interpolation. And yes, Fuji GFX cameras use Bayer-filter sensors, unlike Fuji’s APS-C cameras, which use the X-Trans pattern.
Pixel Shift changes this by using the camera’s stabilization system to physically move the sensor in tiny, precise increments between exposures.
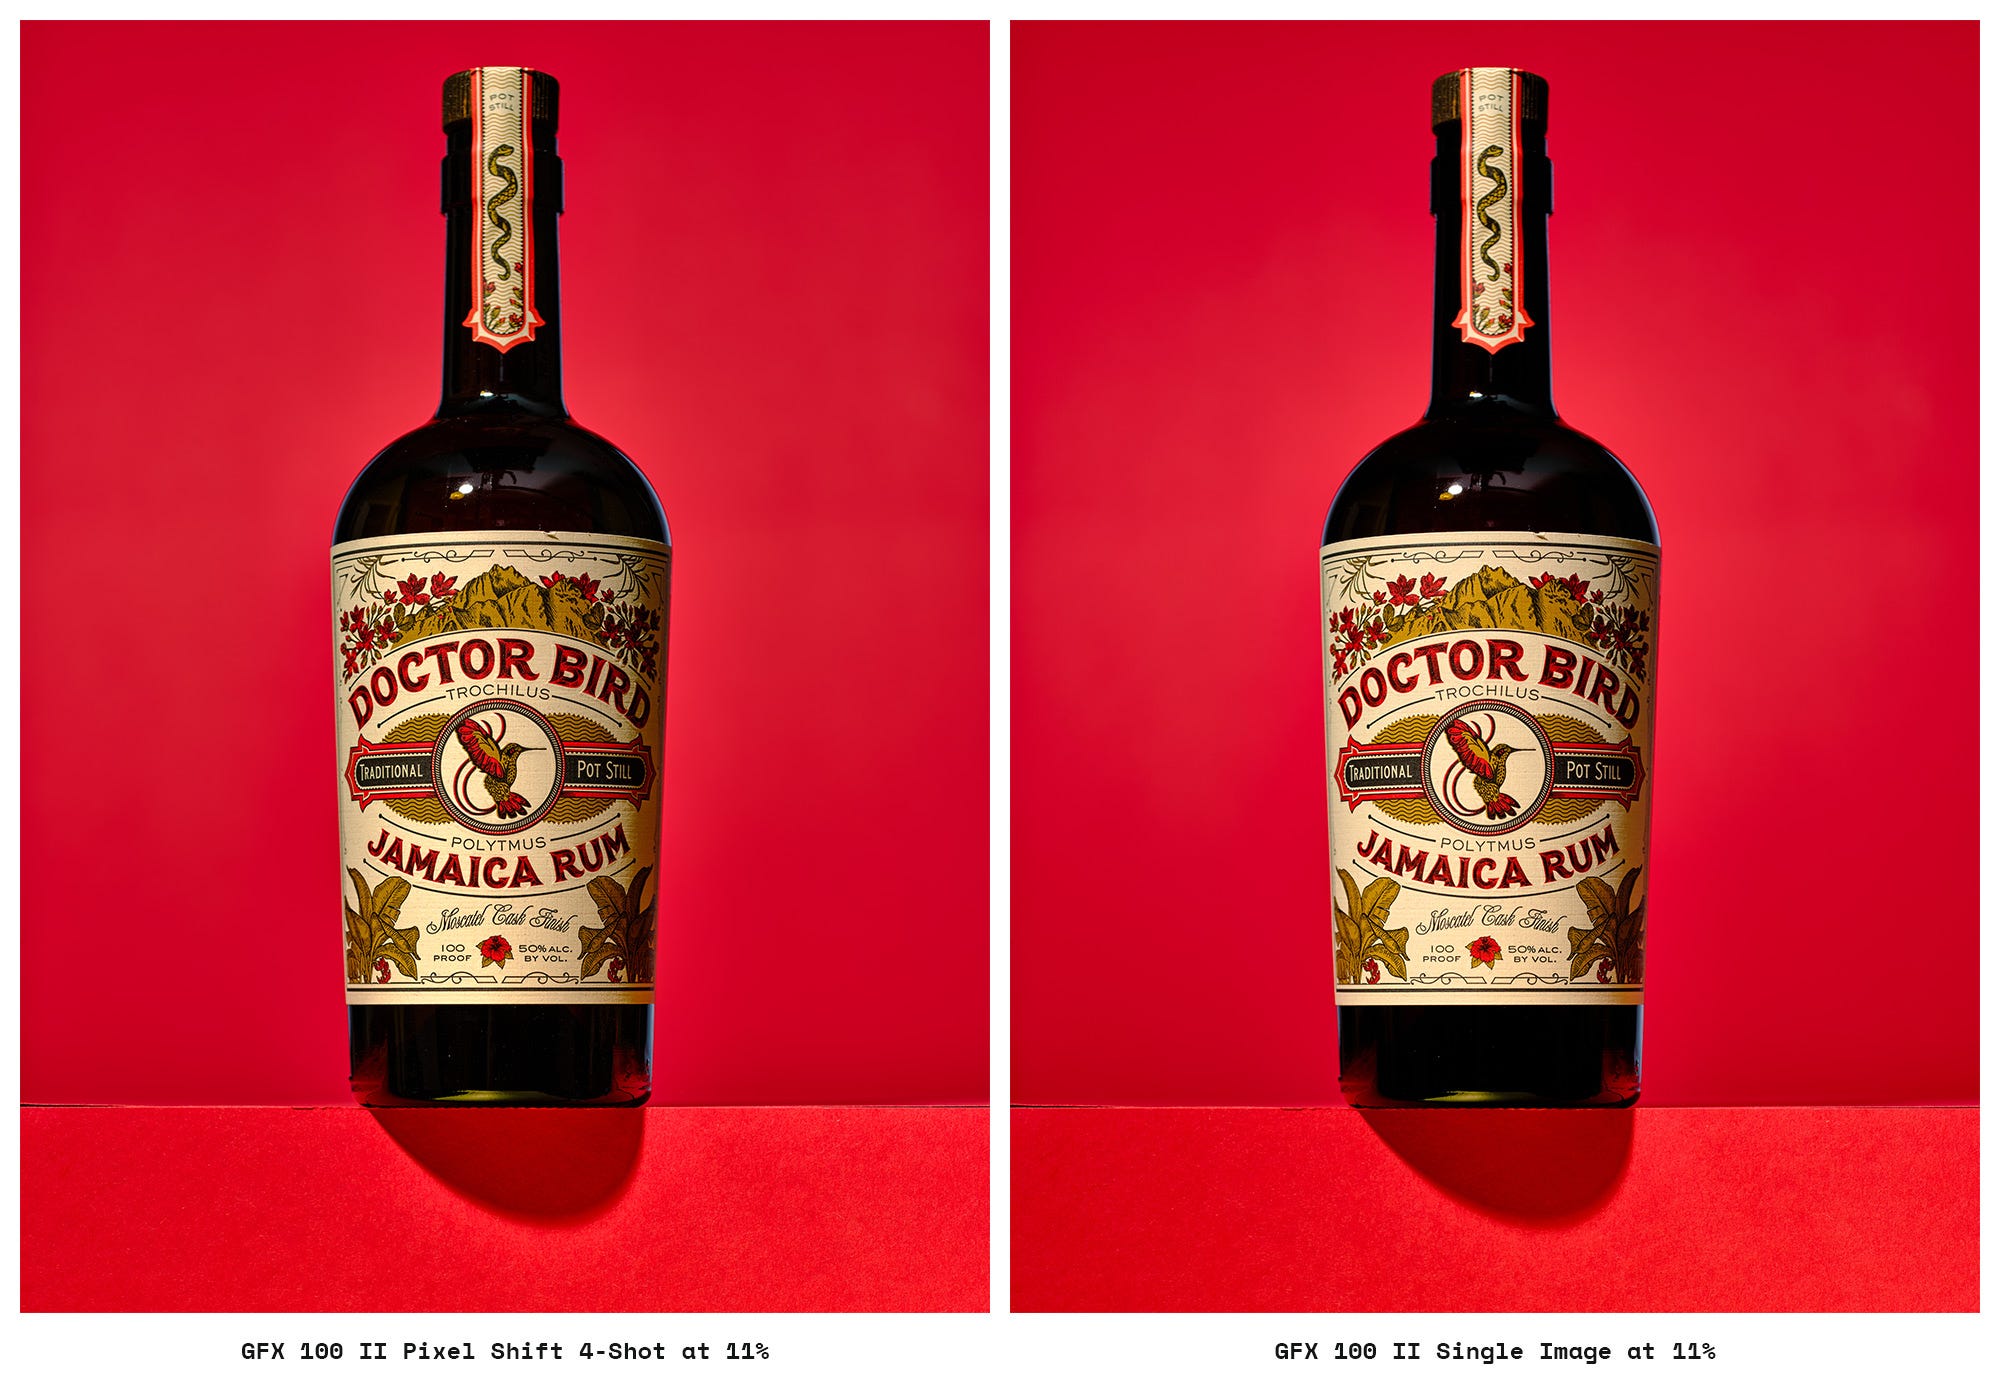
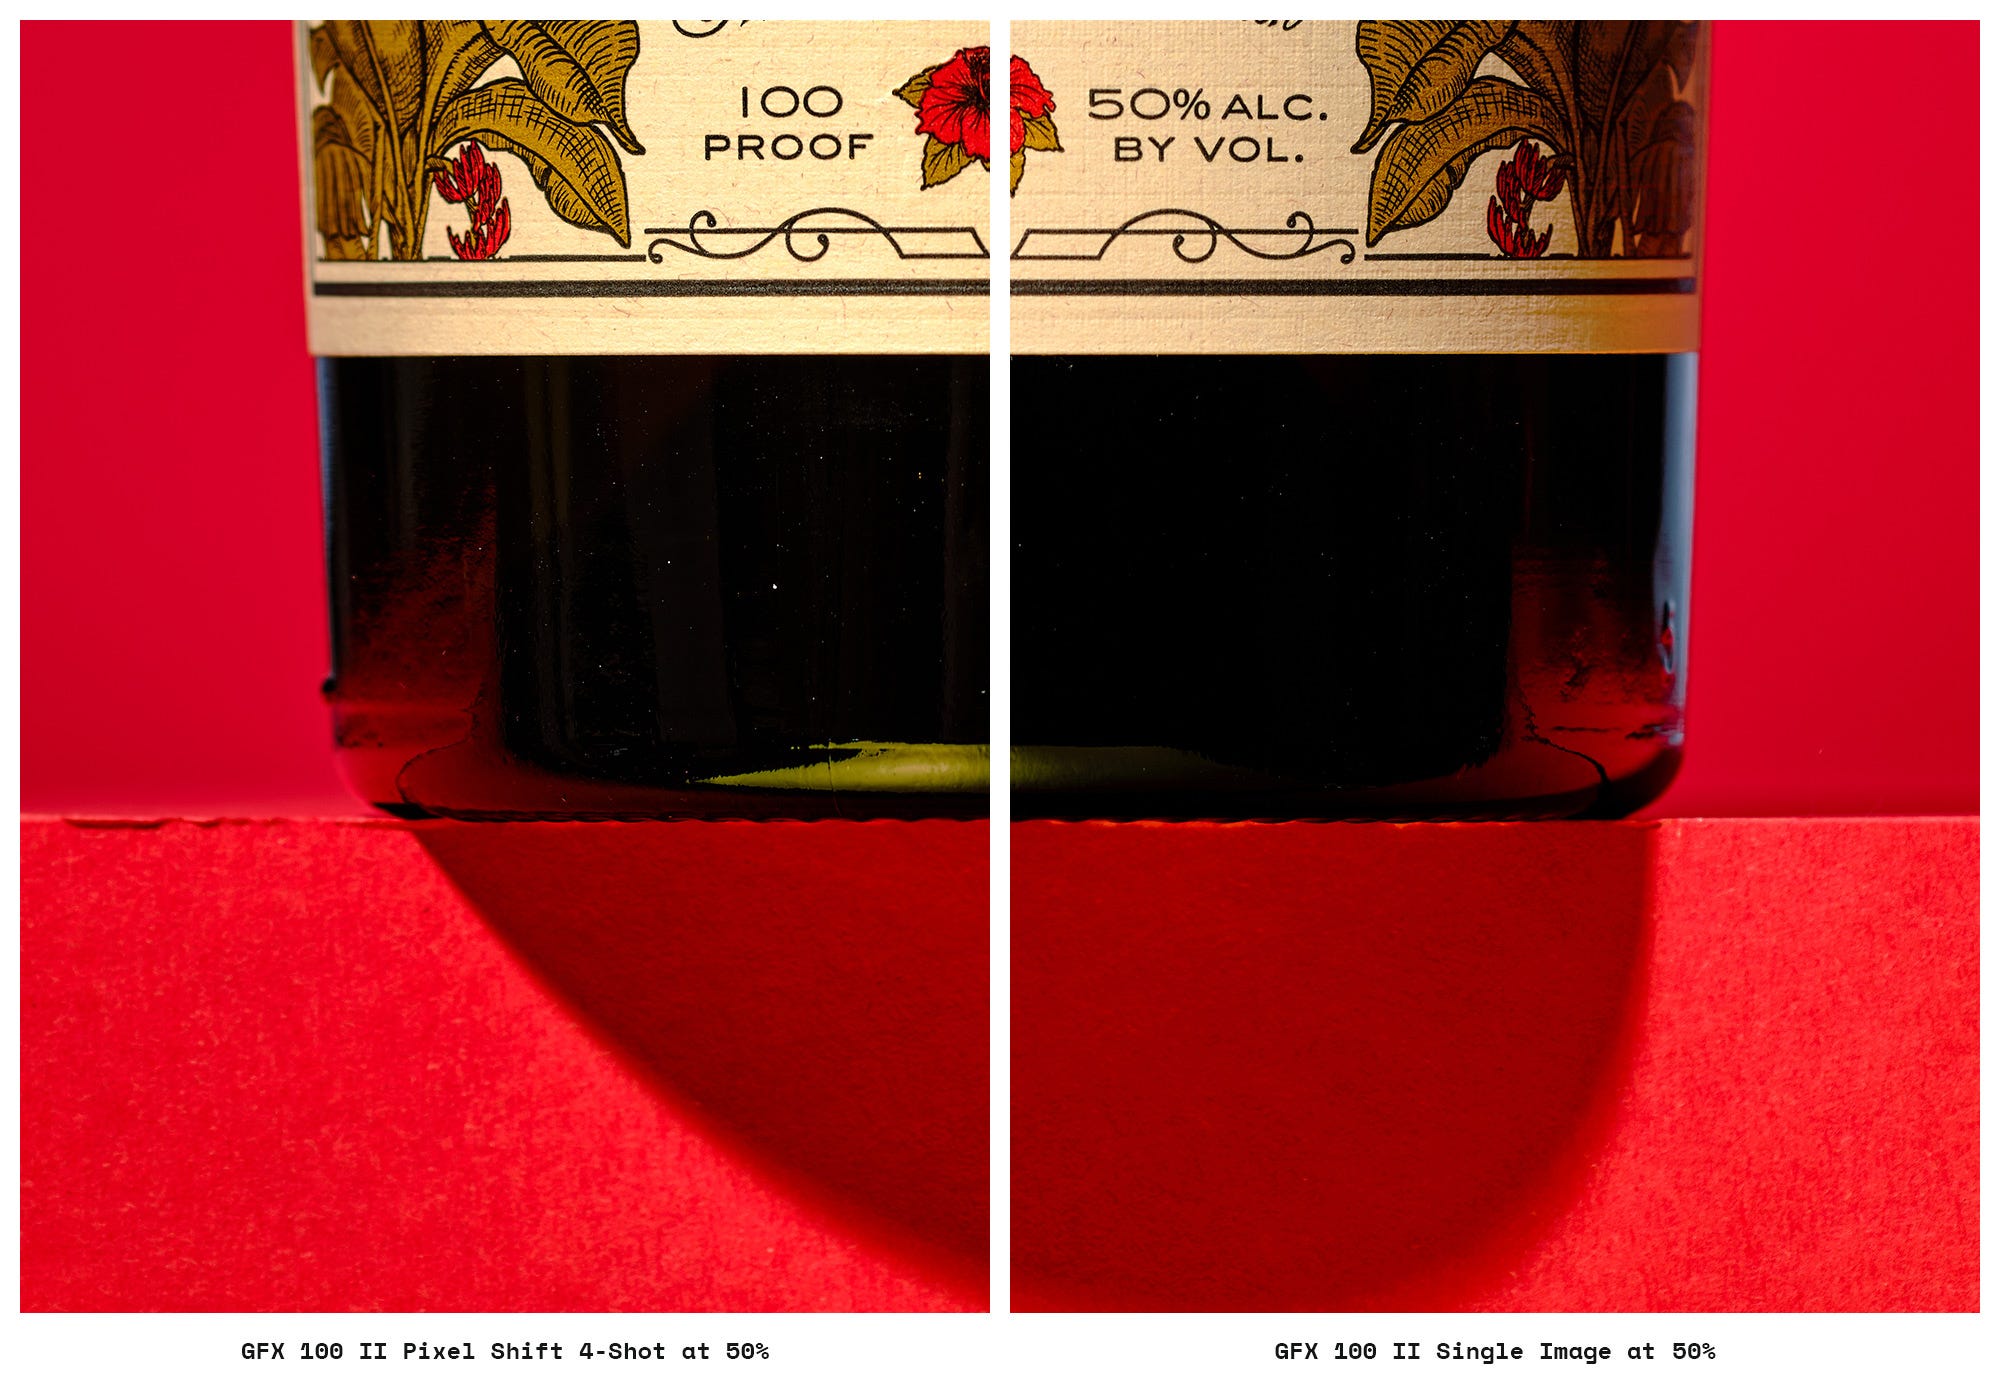
4-Shot Mode: The sensor moves by one full pixel for each shot, ensuring every point on your subject is captured in true Red, Green, and Blue. This eliminates color “guessing” and promises superior tonal transitions and zero moiré.
16-Shot Mode: The sensor moves in half-pixel increments, effectively quadrupling the pixel count. This process is designed to reduce aliasing and provide a much cleaner “canvas” for sharpening, though it does not necessarily increase the lens’s actual resolving power.
Key takeaways from the previous comparison
In my previous article, Fidelity comparisons: 24 MP, 61 MP, & 241 MP Pixel Shift Mode, I compared Sony’s a7 III and a7R IV:
Resolution Benefits: The 61MP files offered clear benefits over 24MP, particularly in retaining fine detail and making selection in Photoshop easier. No surprise here.
Color Fidelity: Sony’s 4-shot mode delivered subtle but measurable improvements in color fidelity across uniform tones.
Stability Issues: The 16-shot mode was often too sensitive to be used reliably without motion artifacts.
Detail vs. Pixels: The 16-shot mode increases the pixel count but does not necessarily increase genuine resolving power or reveal finer details.
Fuji GFX medium rormat & Sony full frame
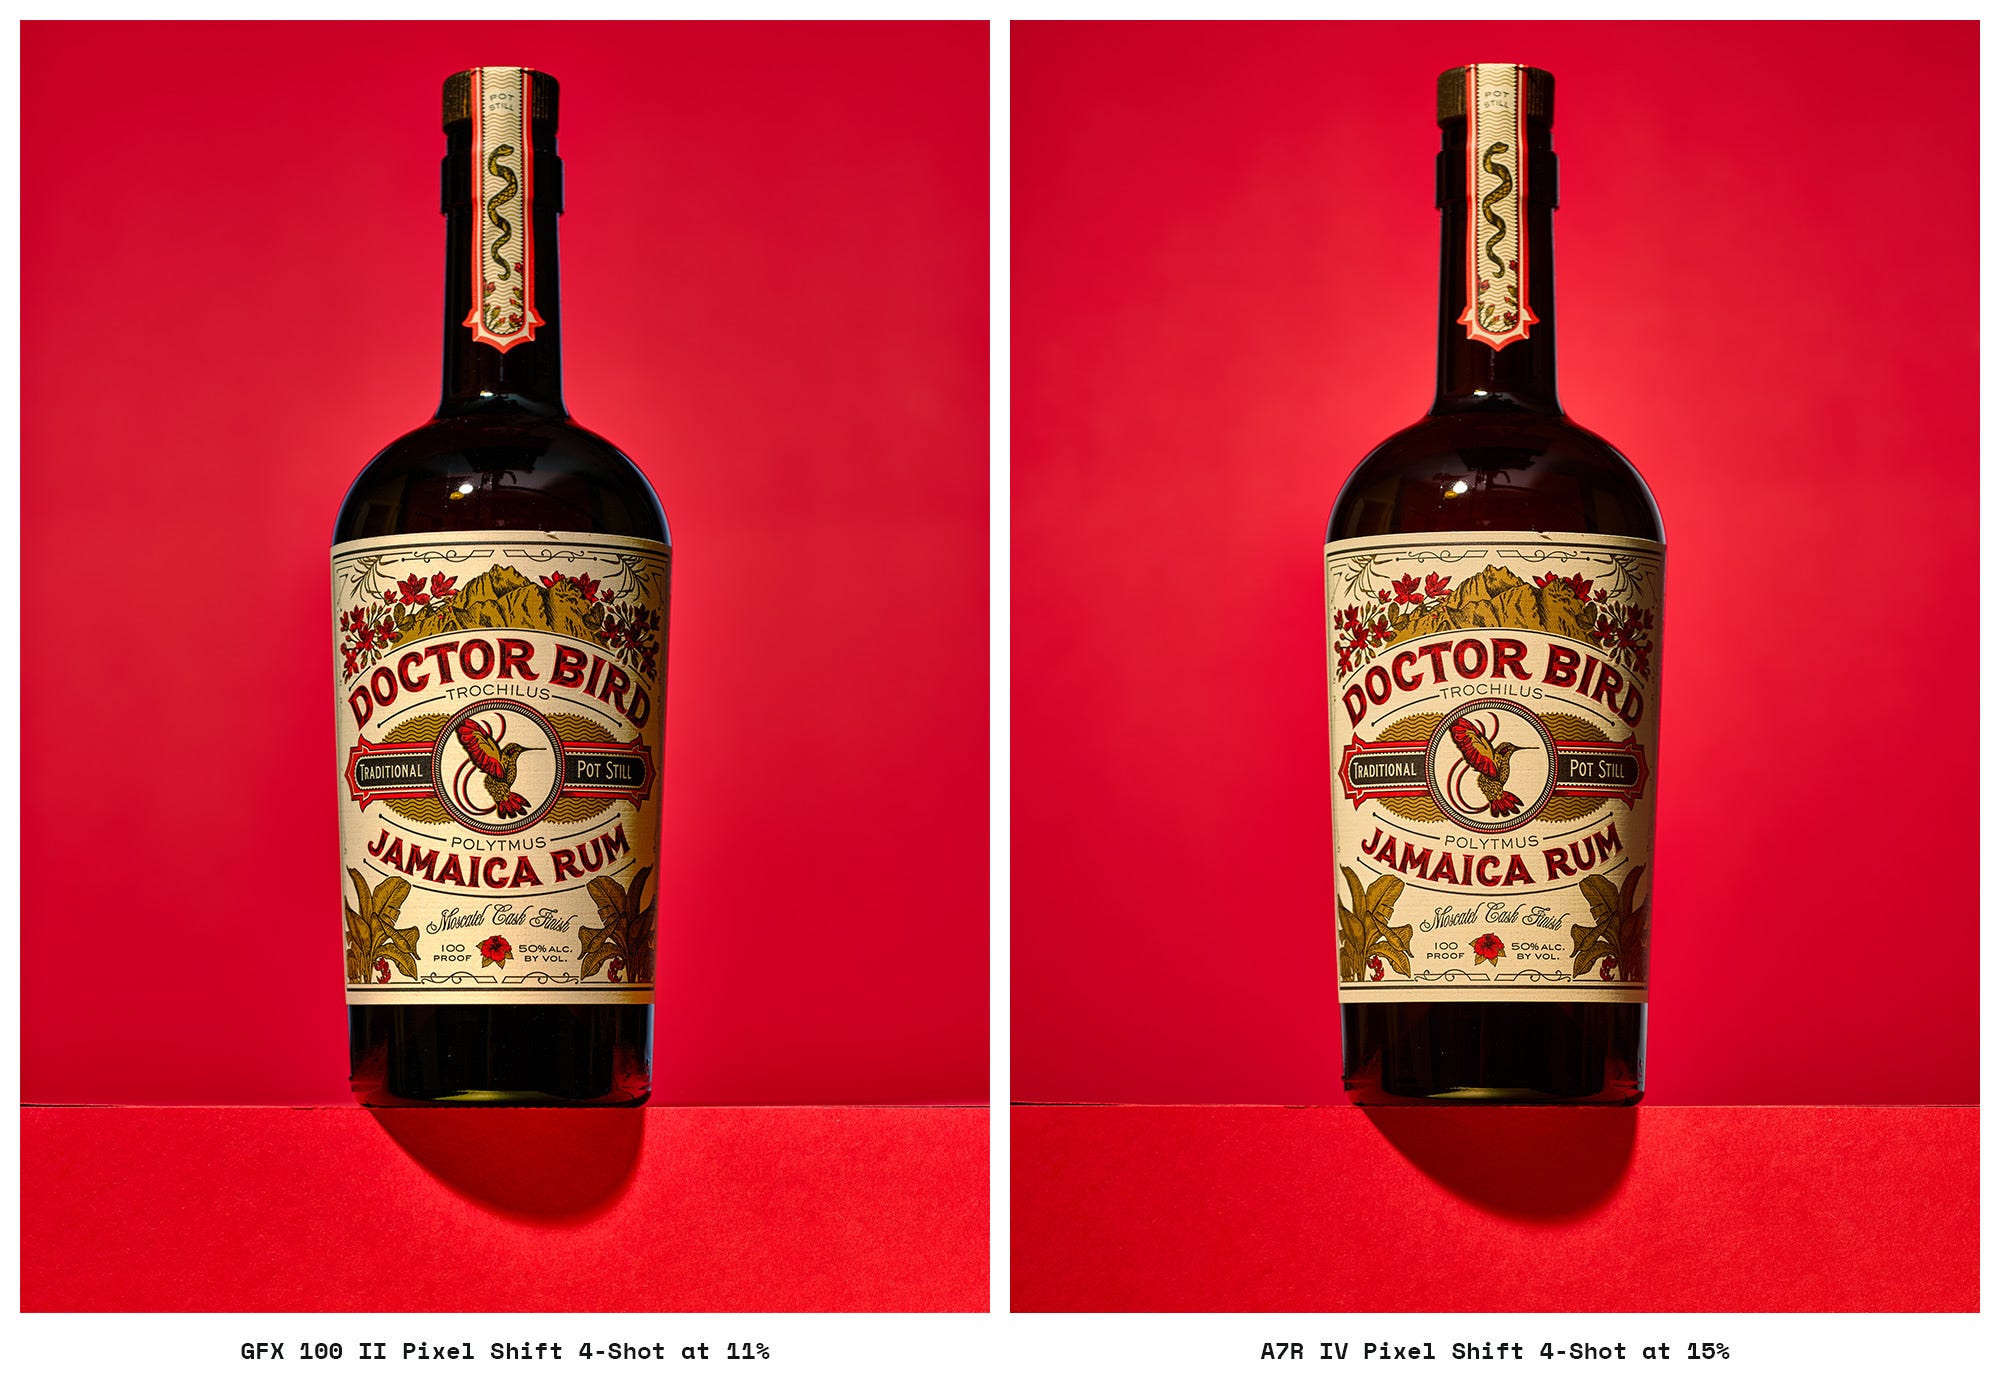
Now that I’m using the Fujifilm GFX 100 II, a camera with a 102MP sensor that is 1.7 times larger than a full-frame sensor, I wanted to revisit the comparison. It features a 4-shot color accuracy mode and a 16-shot Pixel Shift mode that outputs 400MP files.
Native Resolution: 61 MP(Sony) vs. 102 MP (Fuji)
Color Accuracy (4-Shot) Pixel Shift: 61 MP (Sony) vs. 102 MP (Fuji)
High Resolution (16-Shot) Pixel Shift: 240 MP (Sony) vs. 400 MP (Fuji)
I’ll jump straight to the results, with a full deep-dive on my specific camera settings, equipment, and workflow found in the “Setup and Workflow” section at the end of this article.
Native baseline: 102MP vs. 61MP
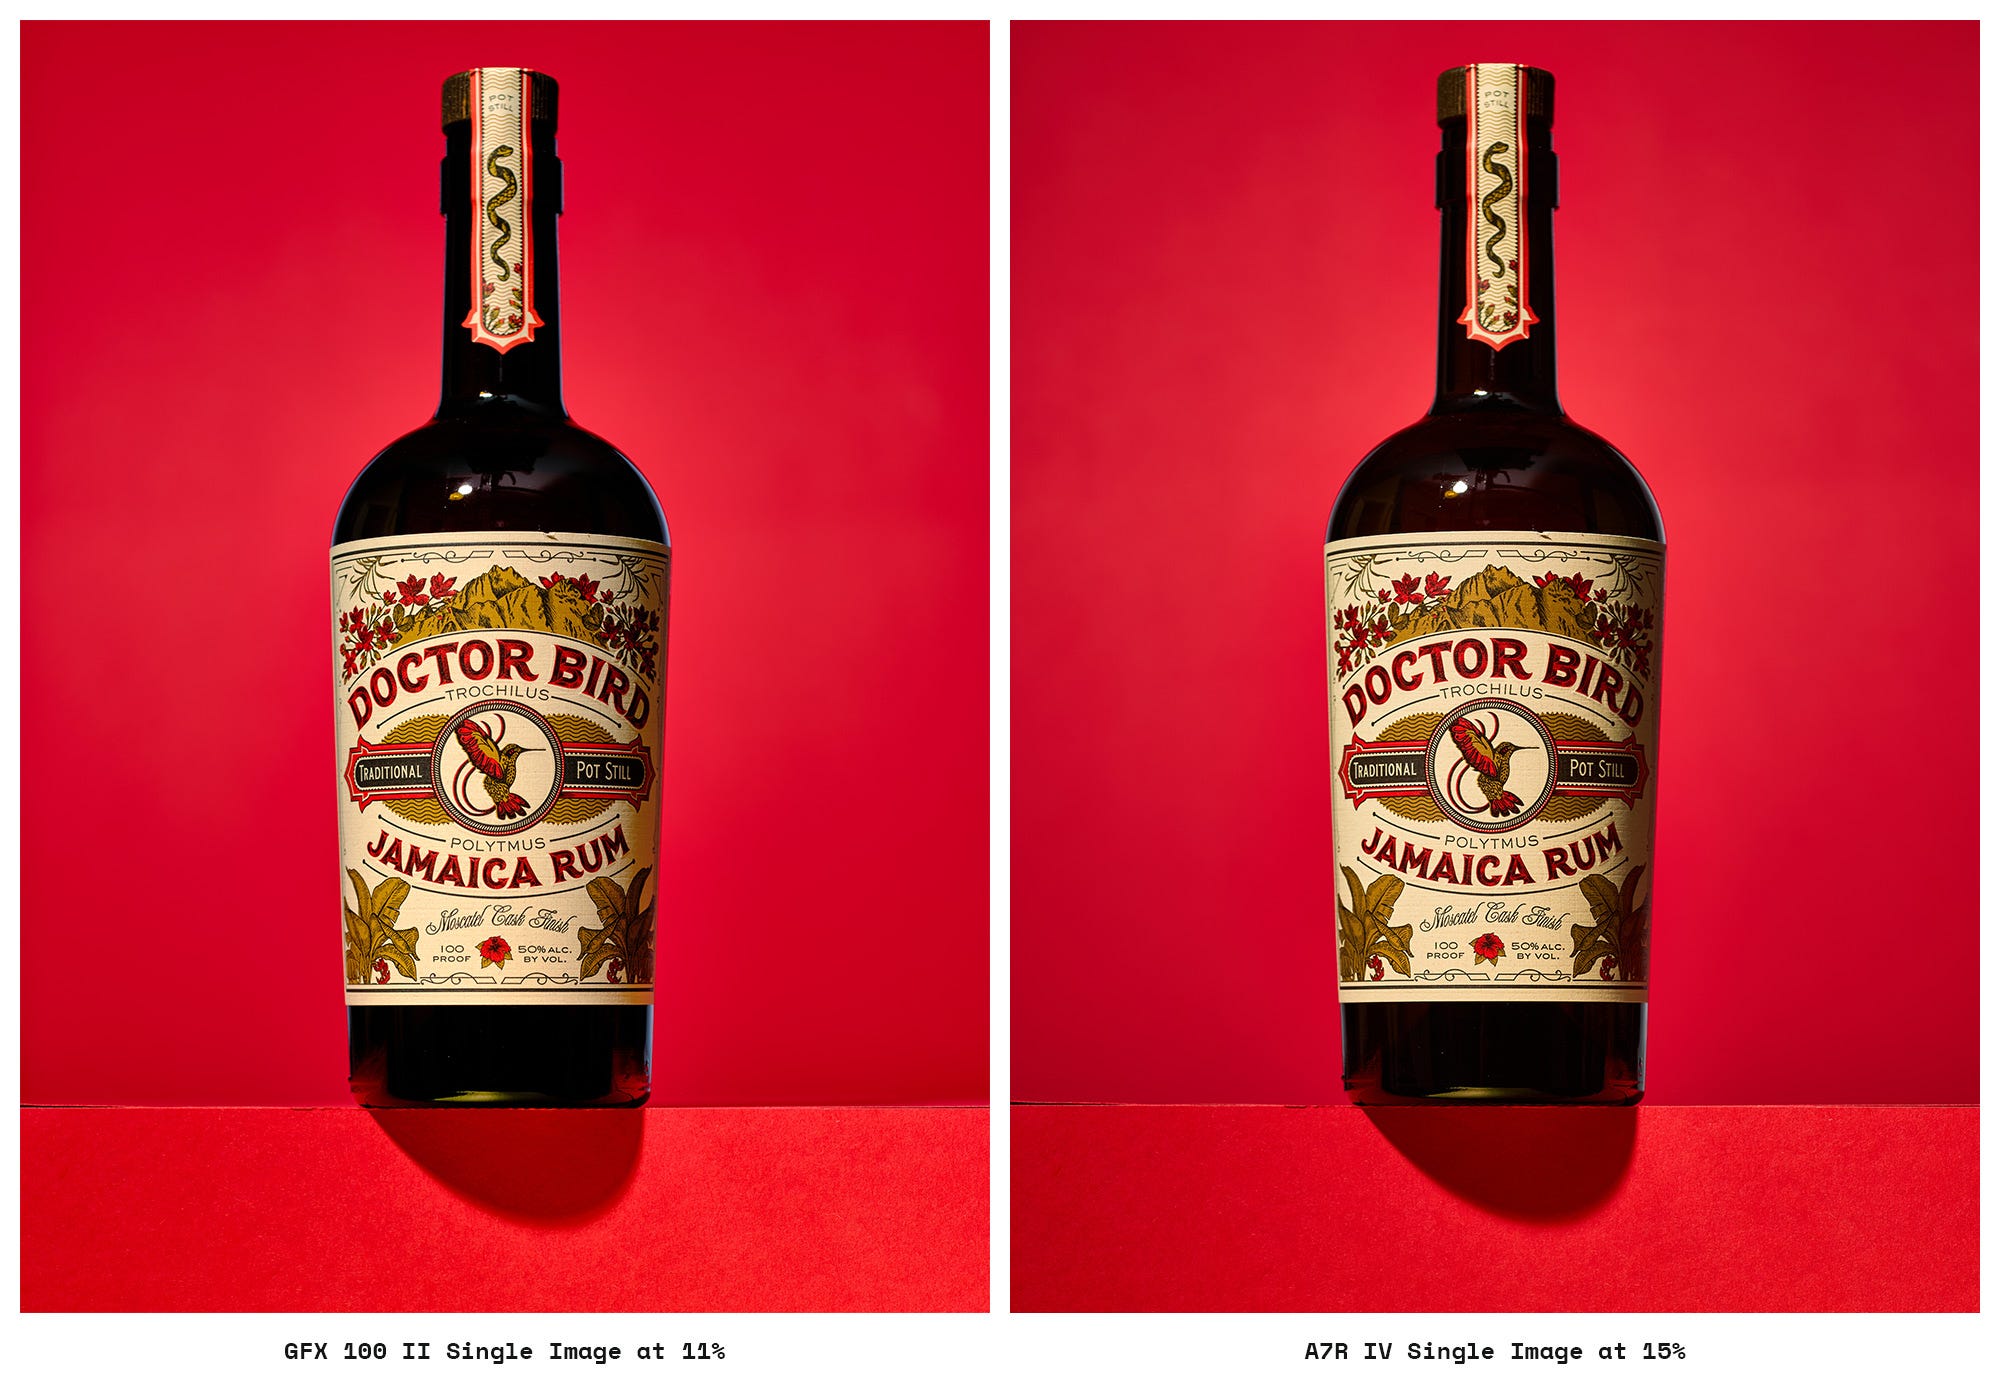
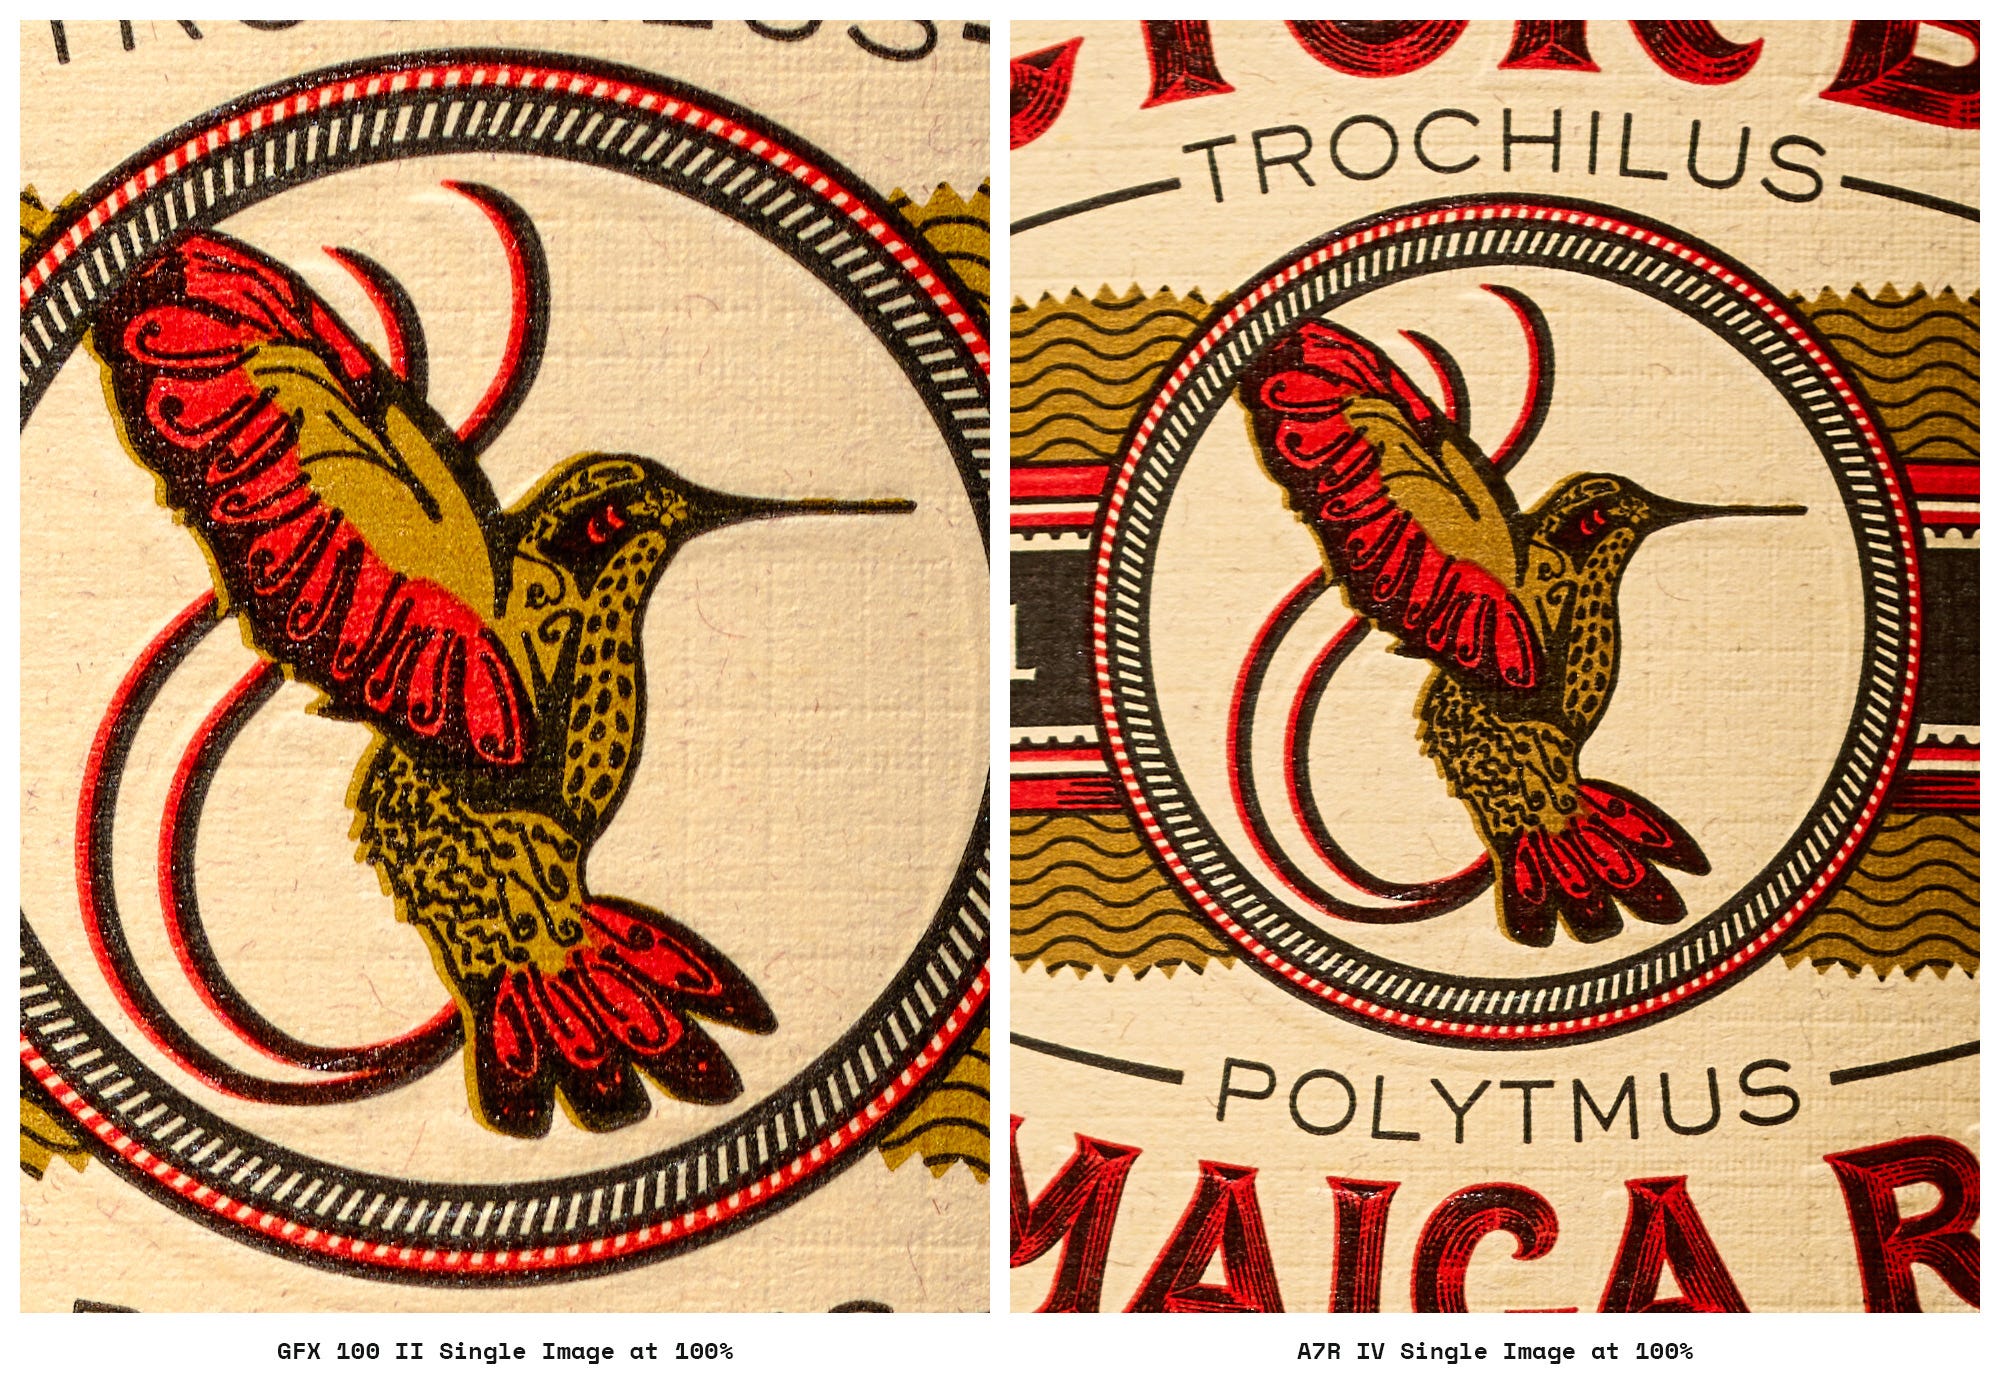
The primary benefit of the Fuji’s native file isn’t solely resolution, but reportedly a superior tonal smoothness afforded by the larger sensor’s greater light-gathering capability and 16-bit depth. In terms of raw detail retention, the 102 MP file was clearly superior at 100% viewing, translating into significantly more editing headroom and cleaner fine details (e.g., fine print on the bottle label). The 16-bit Fuji files promise better shadow gradation with noticeably cleaner details, but in a well-lit studio environment, I’m not seeing a huge difference. The extra detail is practically meaningful for large-format printing. Yes, I have made larger prints with the GFX, most recently a 42x56-inch piece. Perhaps I’ll write up that process later.
Tonal Depth: The primary benefit of the Fuji’s native file isn’t solely resolution, but the superior tonal smoothness afforded by the larger sensor’s light-gathering and 16-bit depth.
Practical Verdict: I like the color on the Fuji, but I never really had issues with the Sony either. While the Fuji is a bit faster as a starting point for my stills, I wouldn’t pick it over the Sony for that reason alone.
4-shot pixel shift for color & tonal accuracy
This mode aims to provide full RGB data at every pixel without increasing the overall file size.
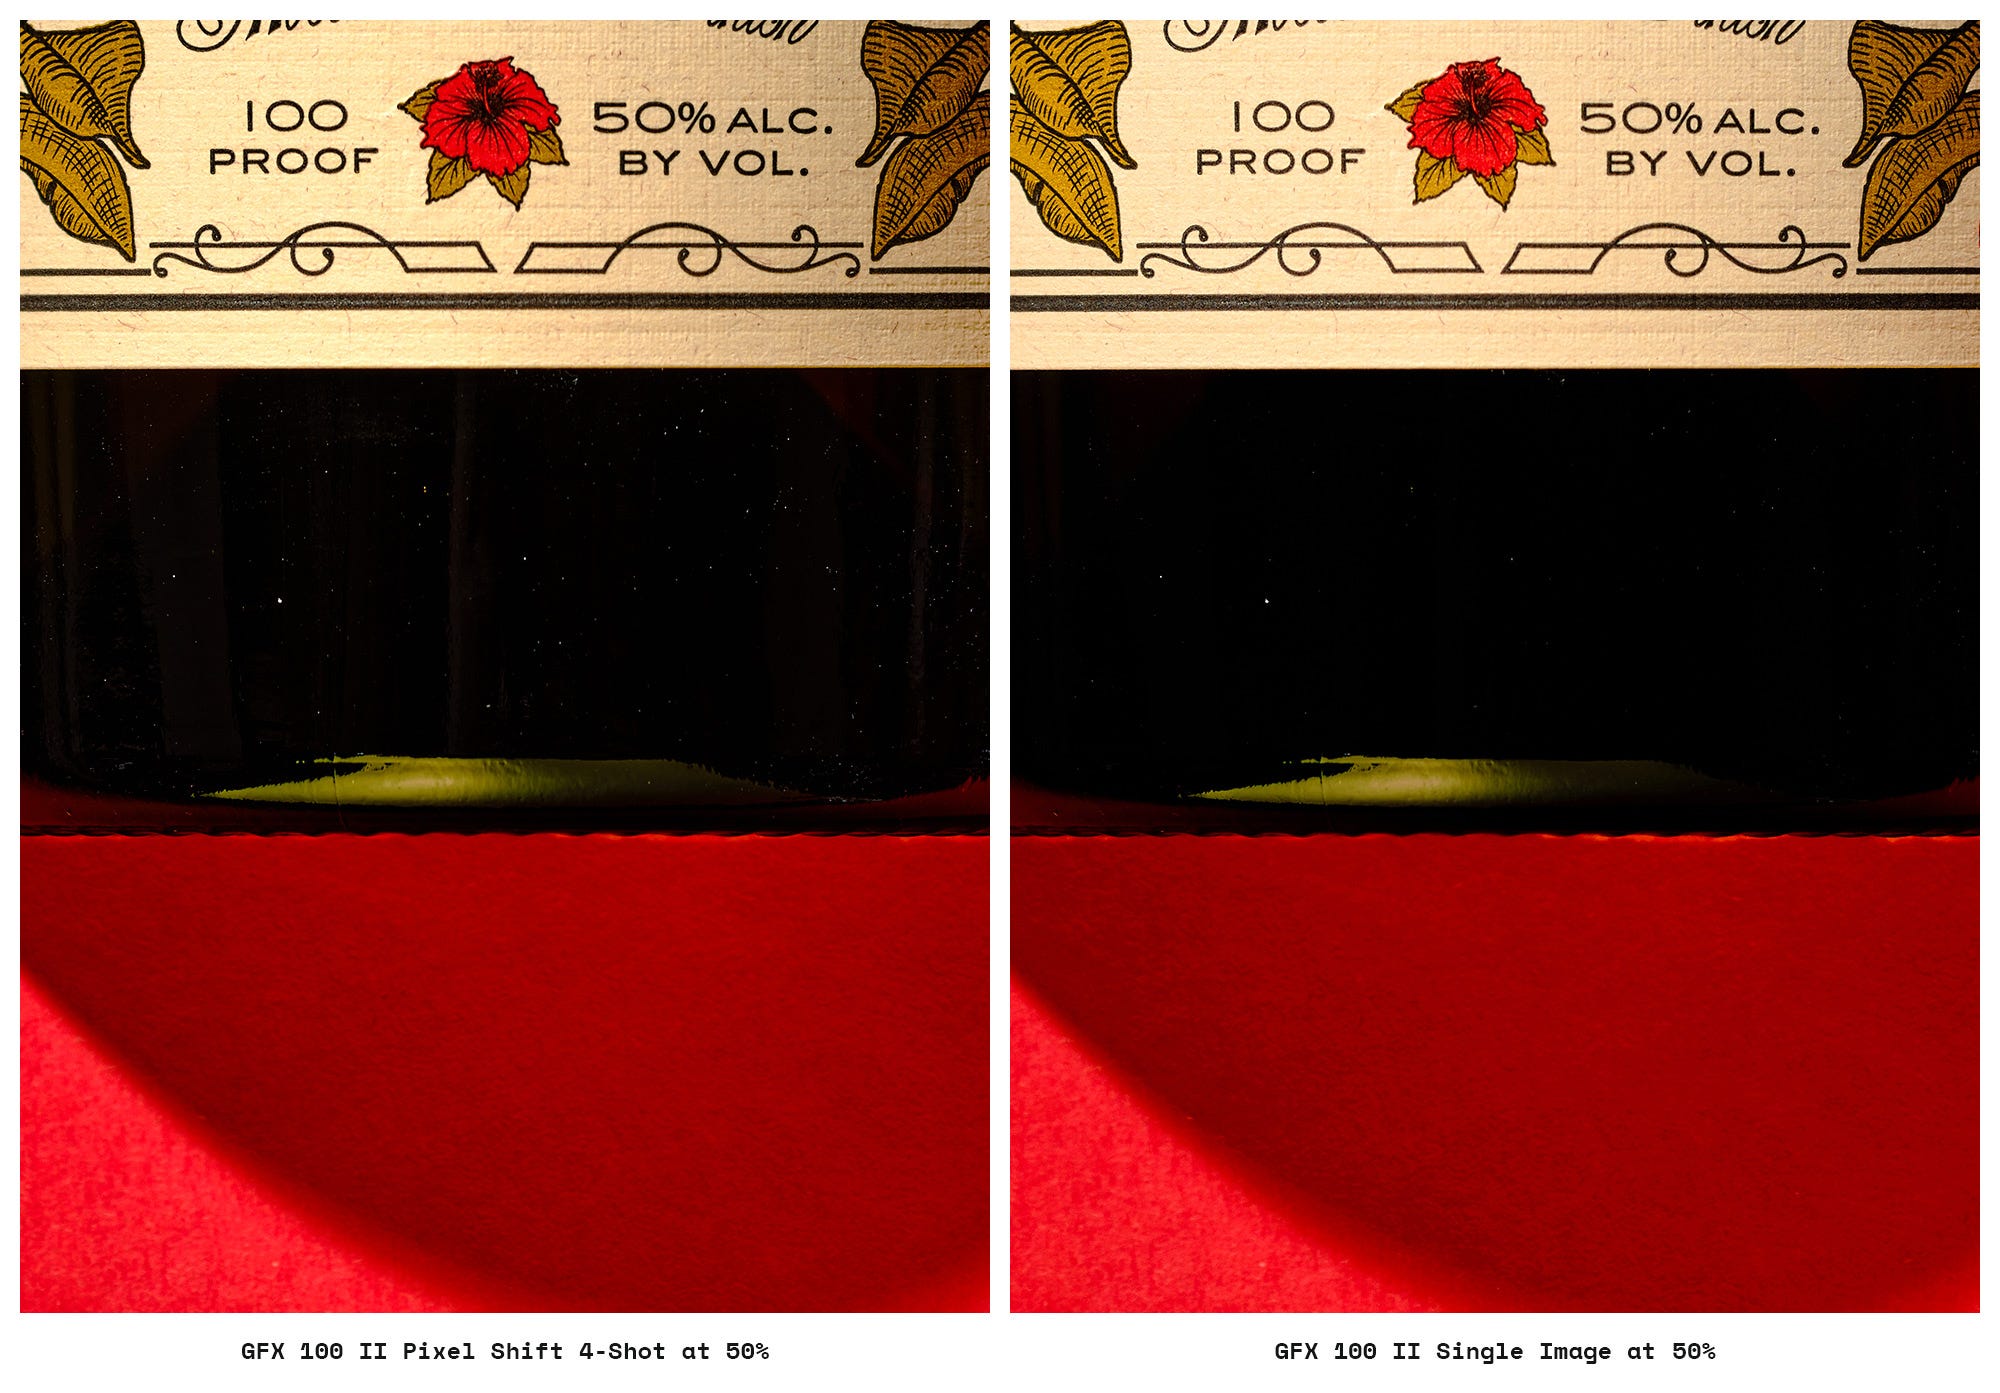
Fuji’s 4-shot pixel shift vs its single image
Since the Fuji already captures in 16-bit color, the difference in gradients was minor in my tests. While the gradient improvement was subtle, the 4-shot mode on the Fuji does seem to exhibit better highlight roll-off than single-shot captures.
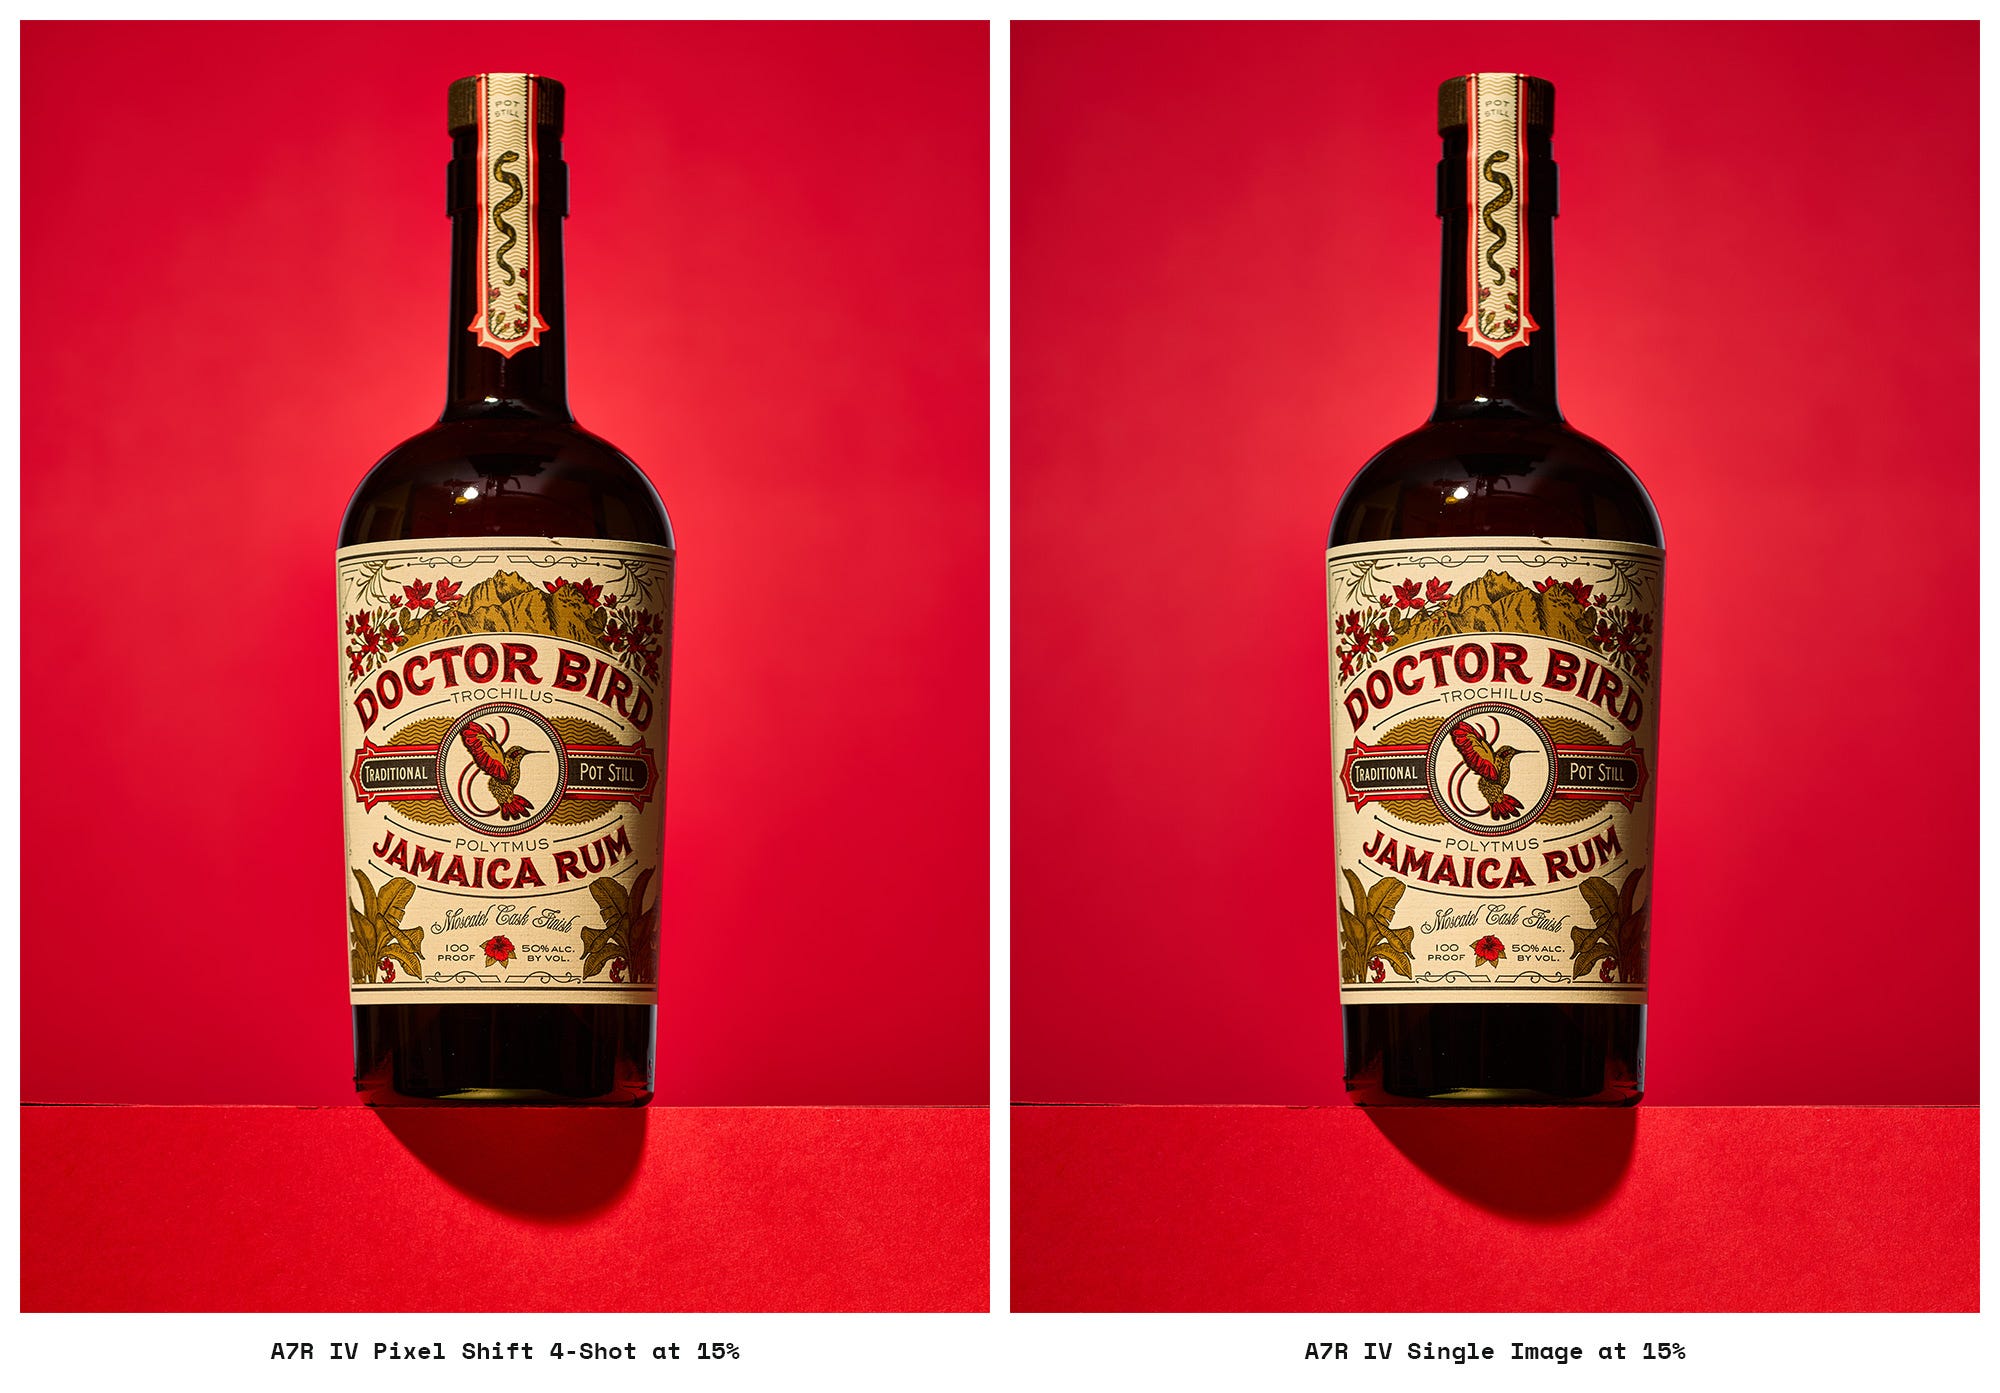
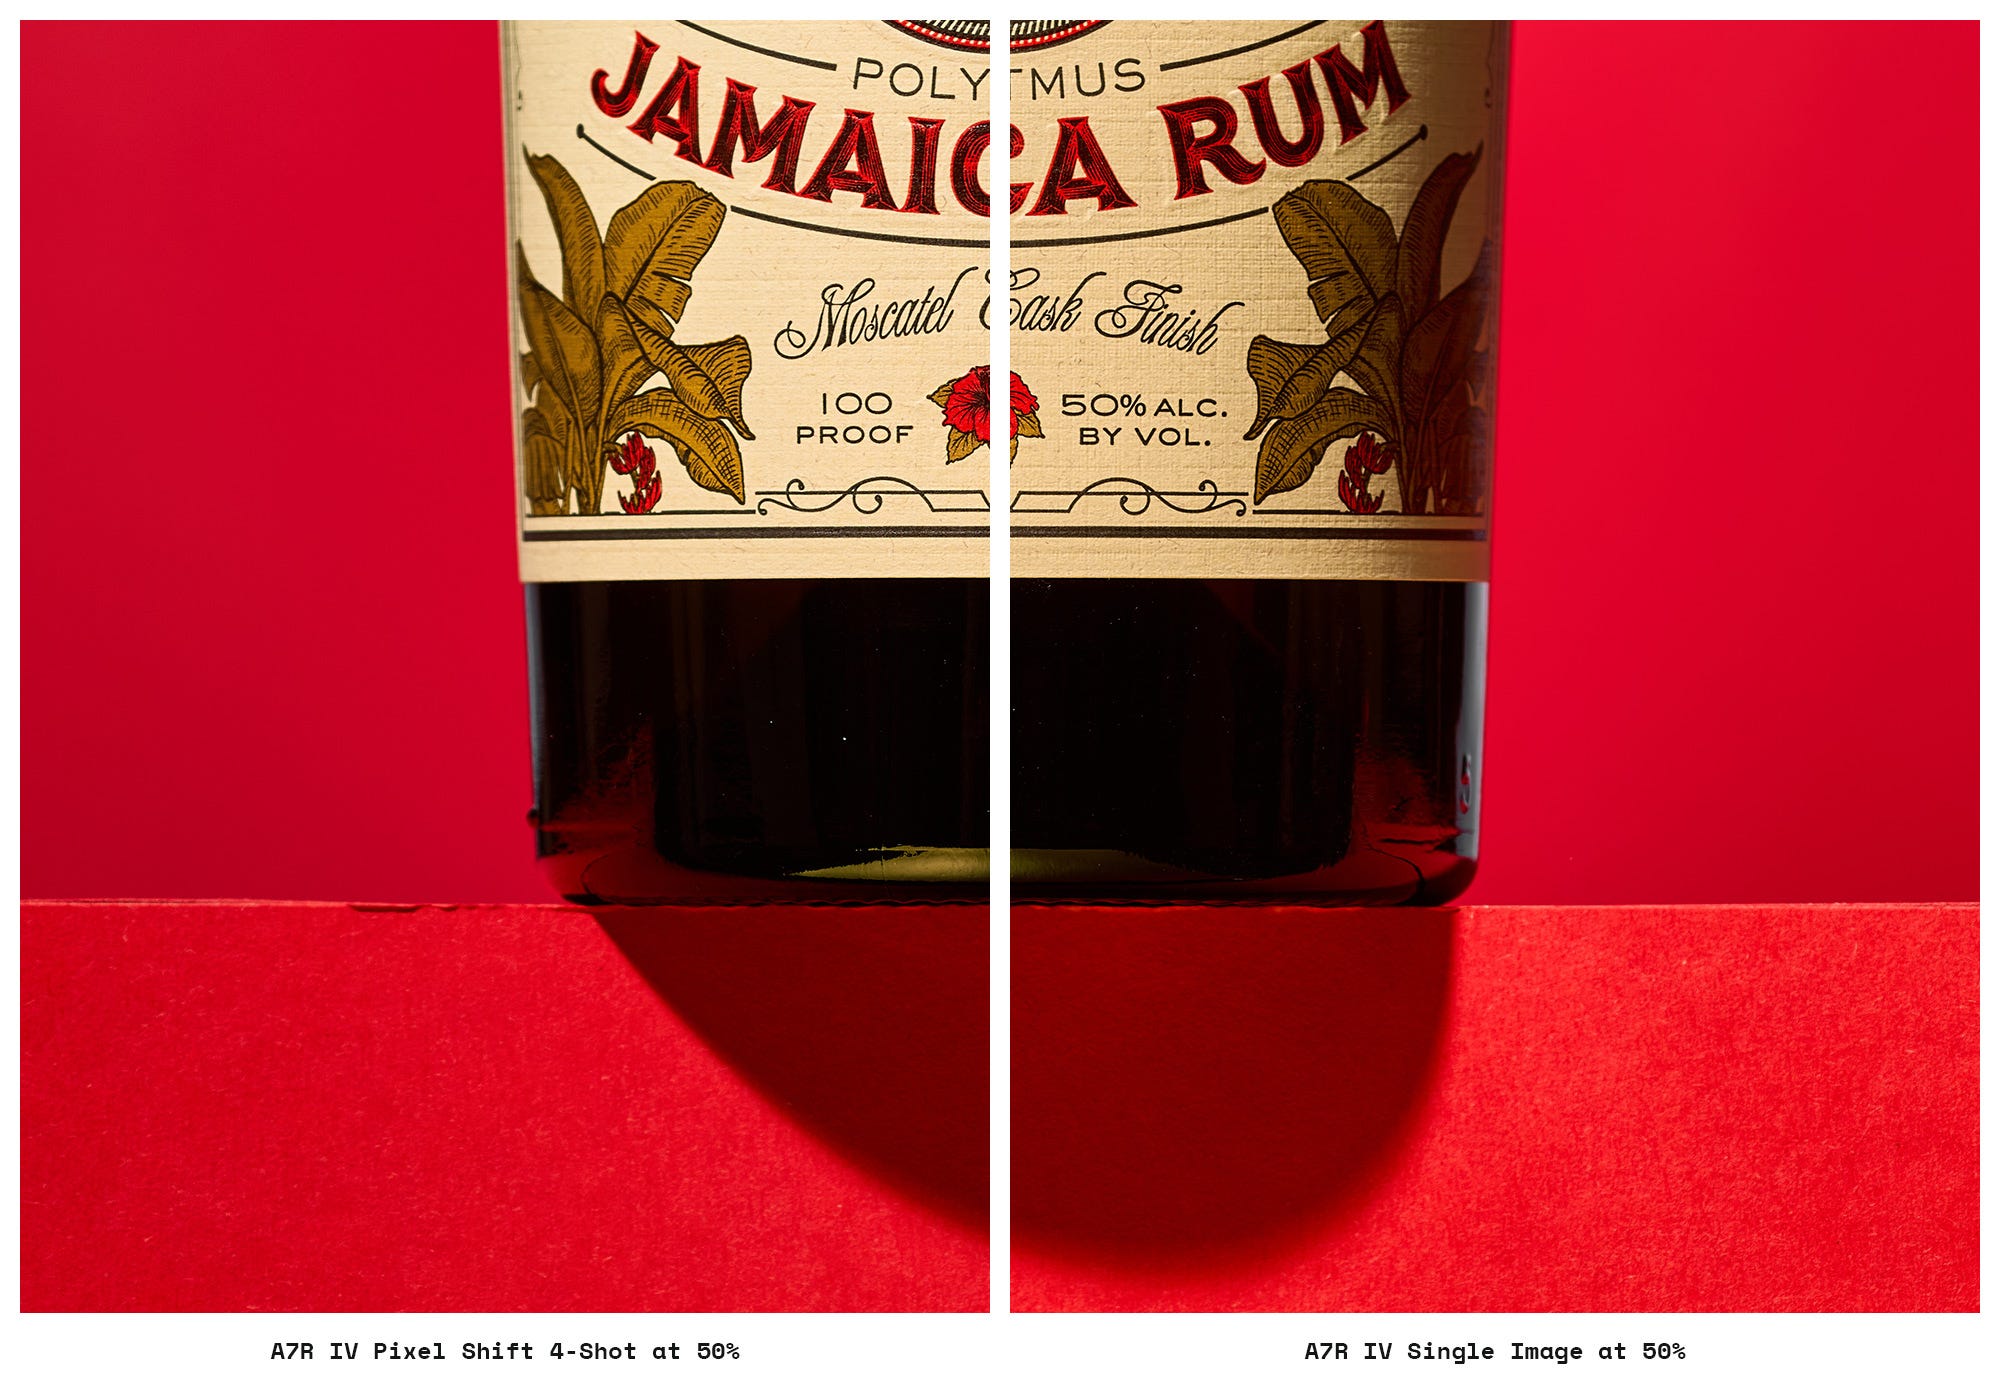
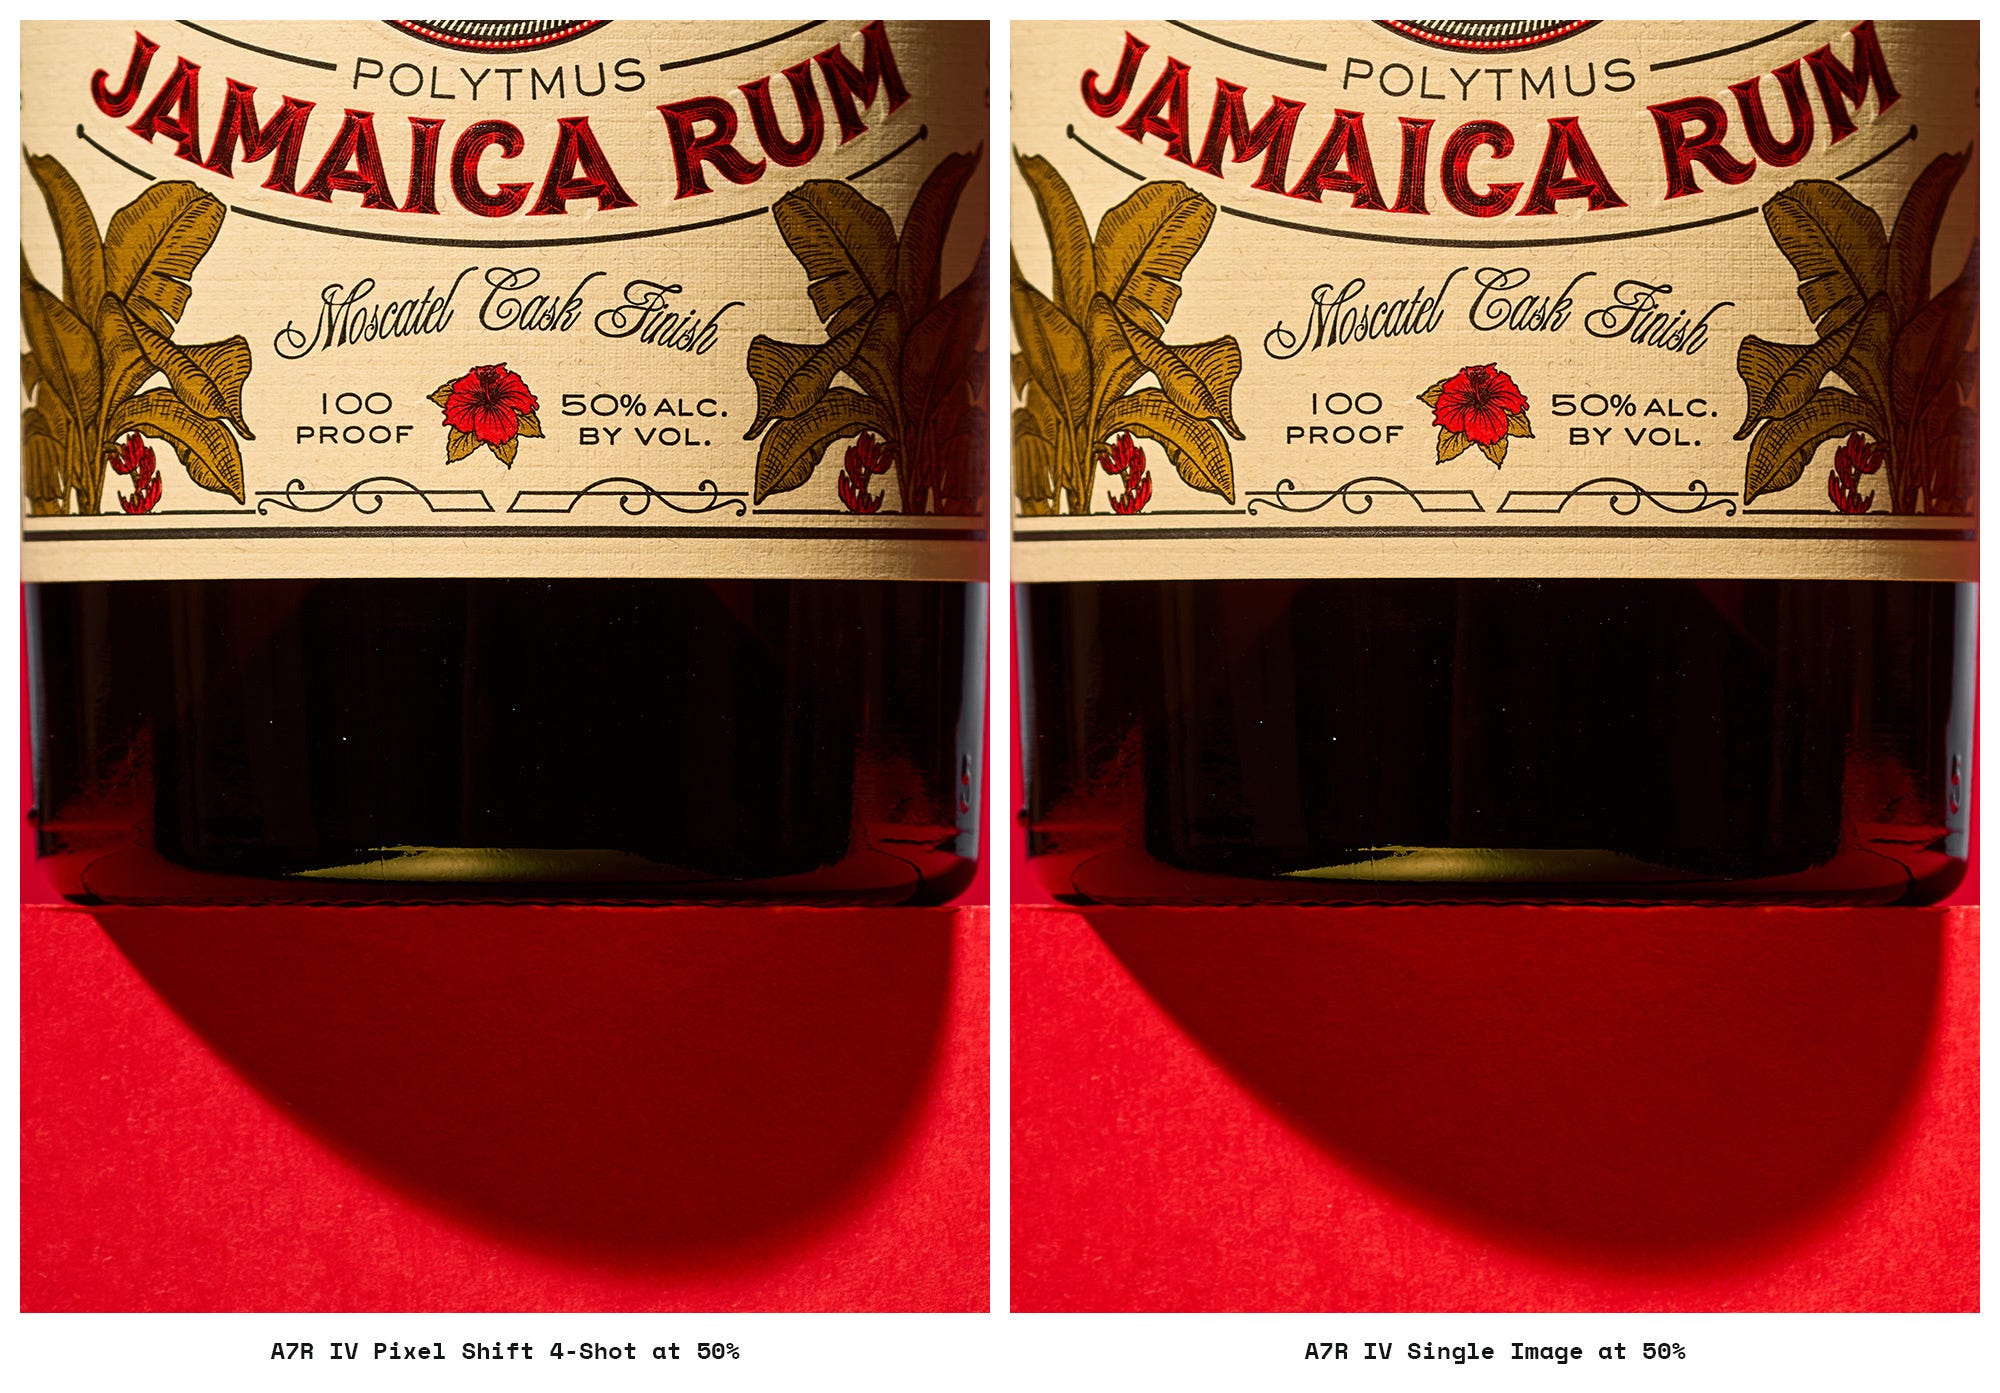
Sony’s 4-shot pixel shift vs its single image
Sony Performance: 4-shot color does seem to help with the Sony files, but it’s still subtle.
Fuji 4-shot pixel shift vs Sony 4-shot pixel shift
I figured I could share a side-by-side, but I’m not drawing any conclusions.

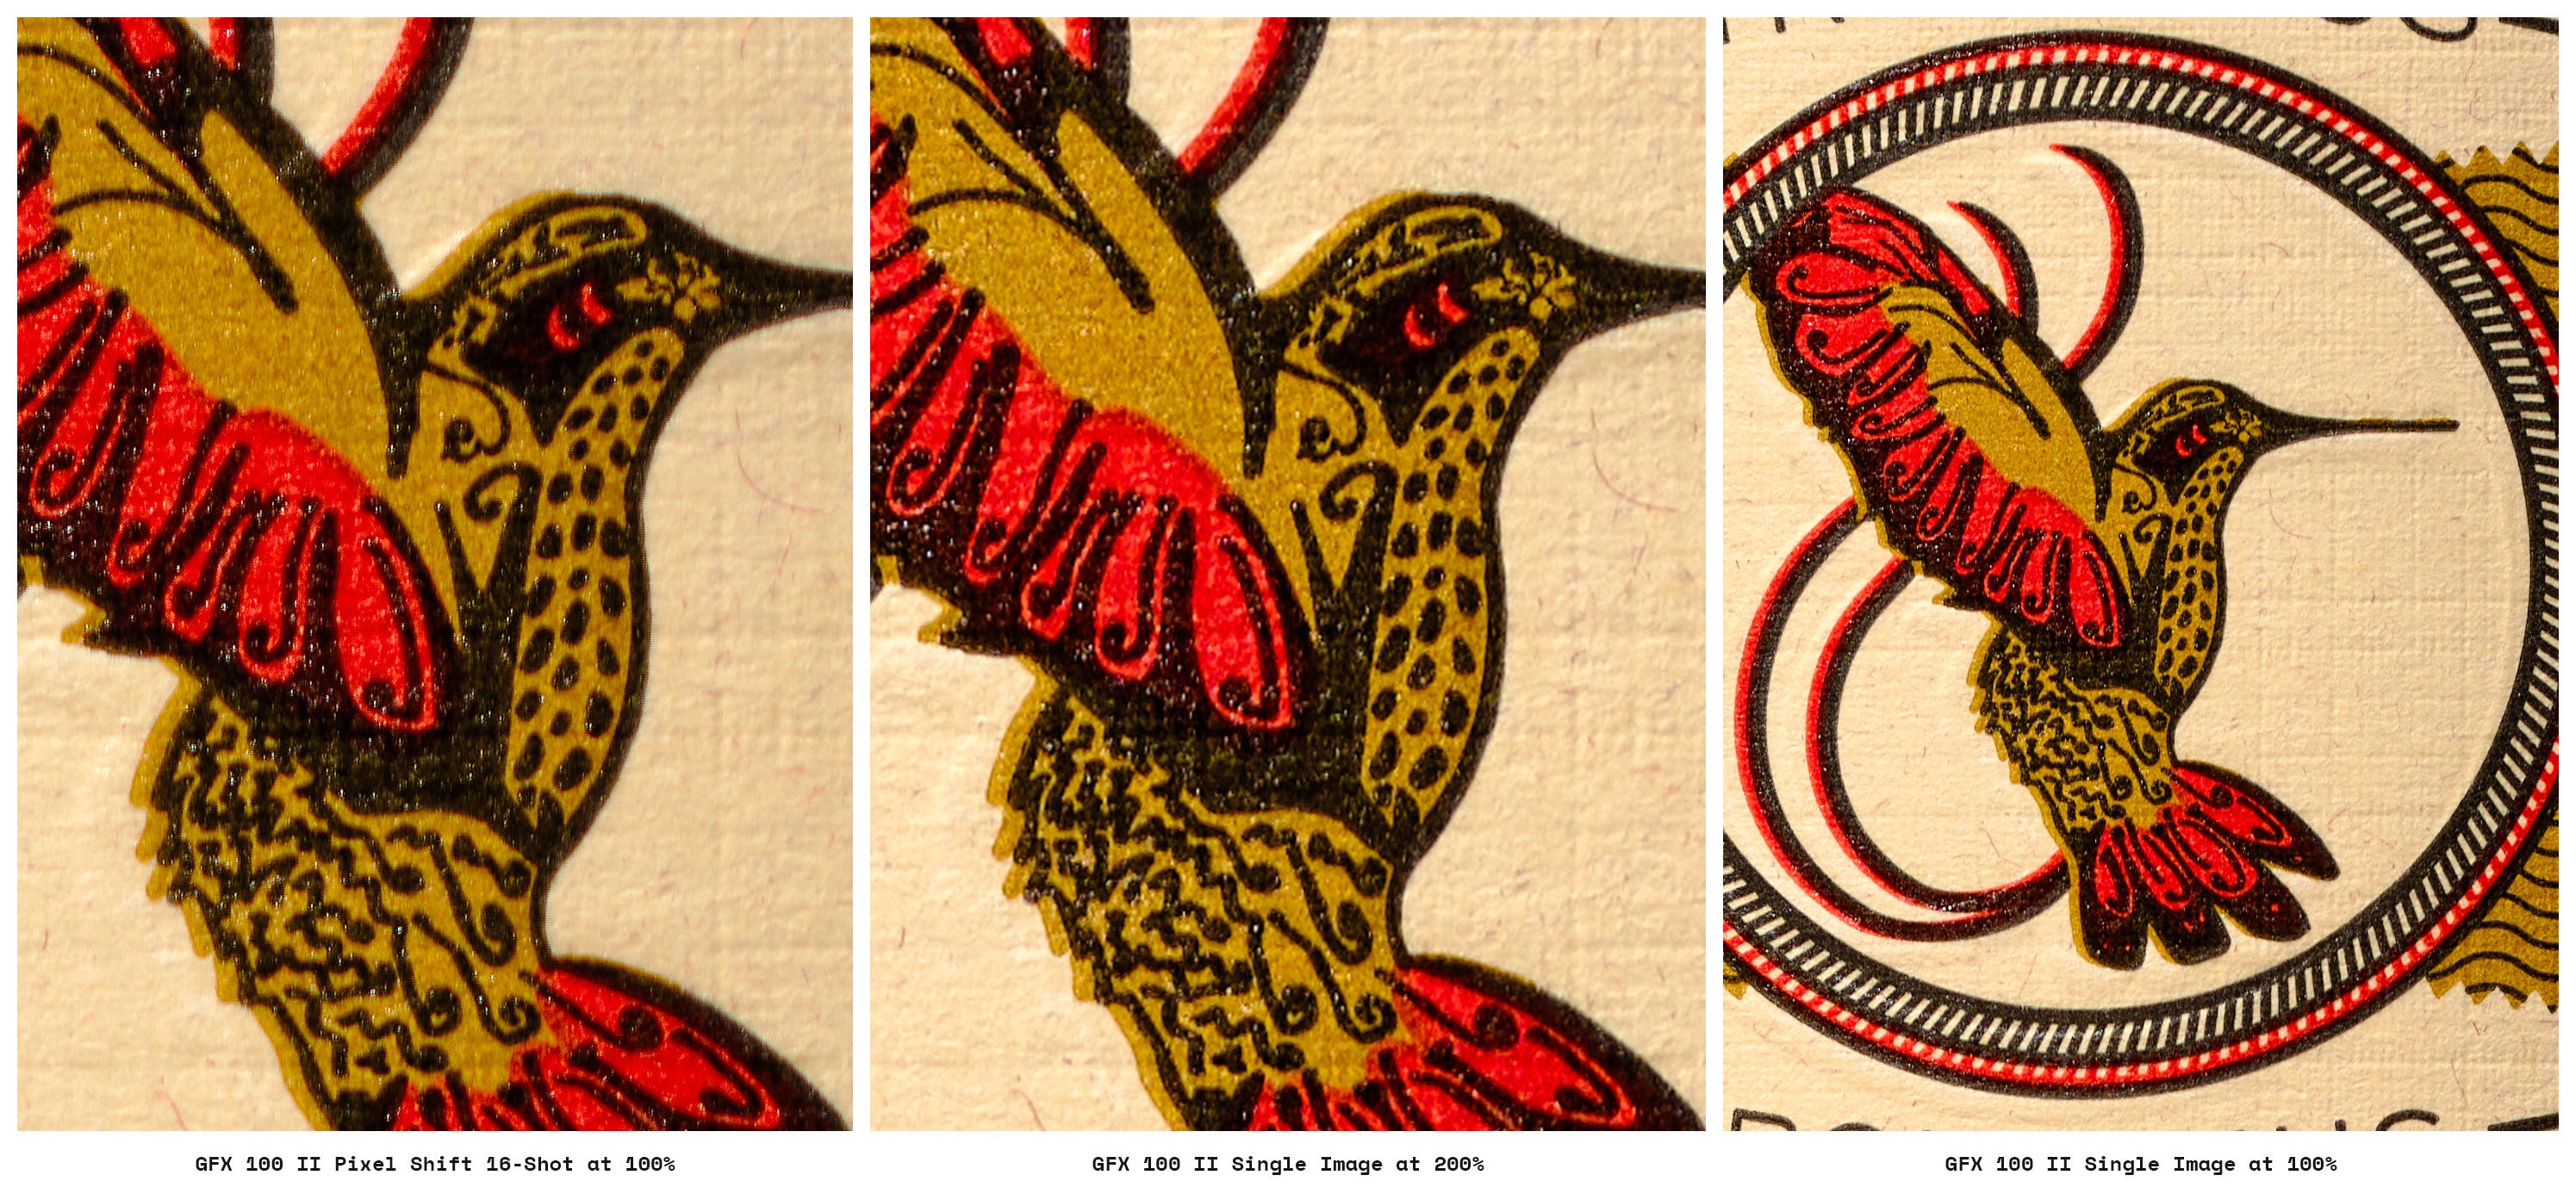
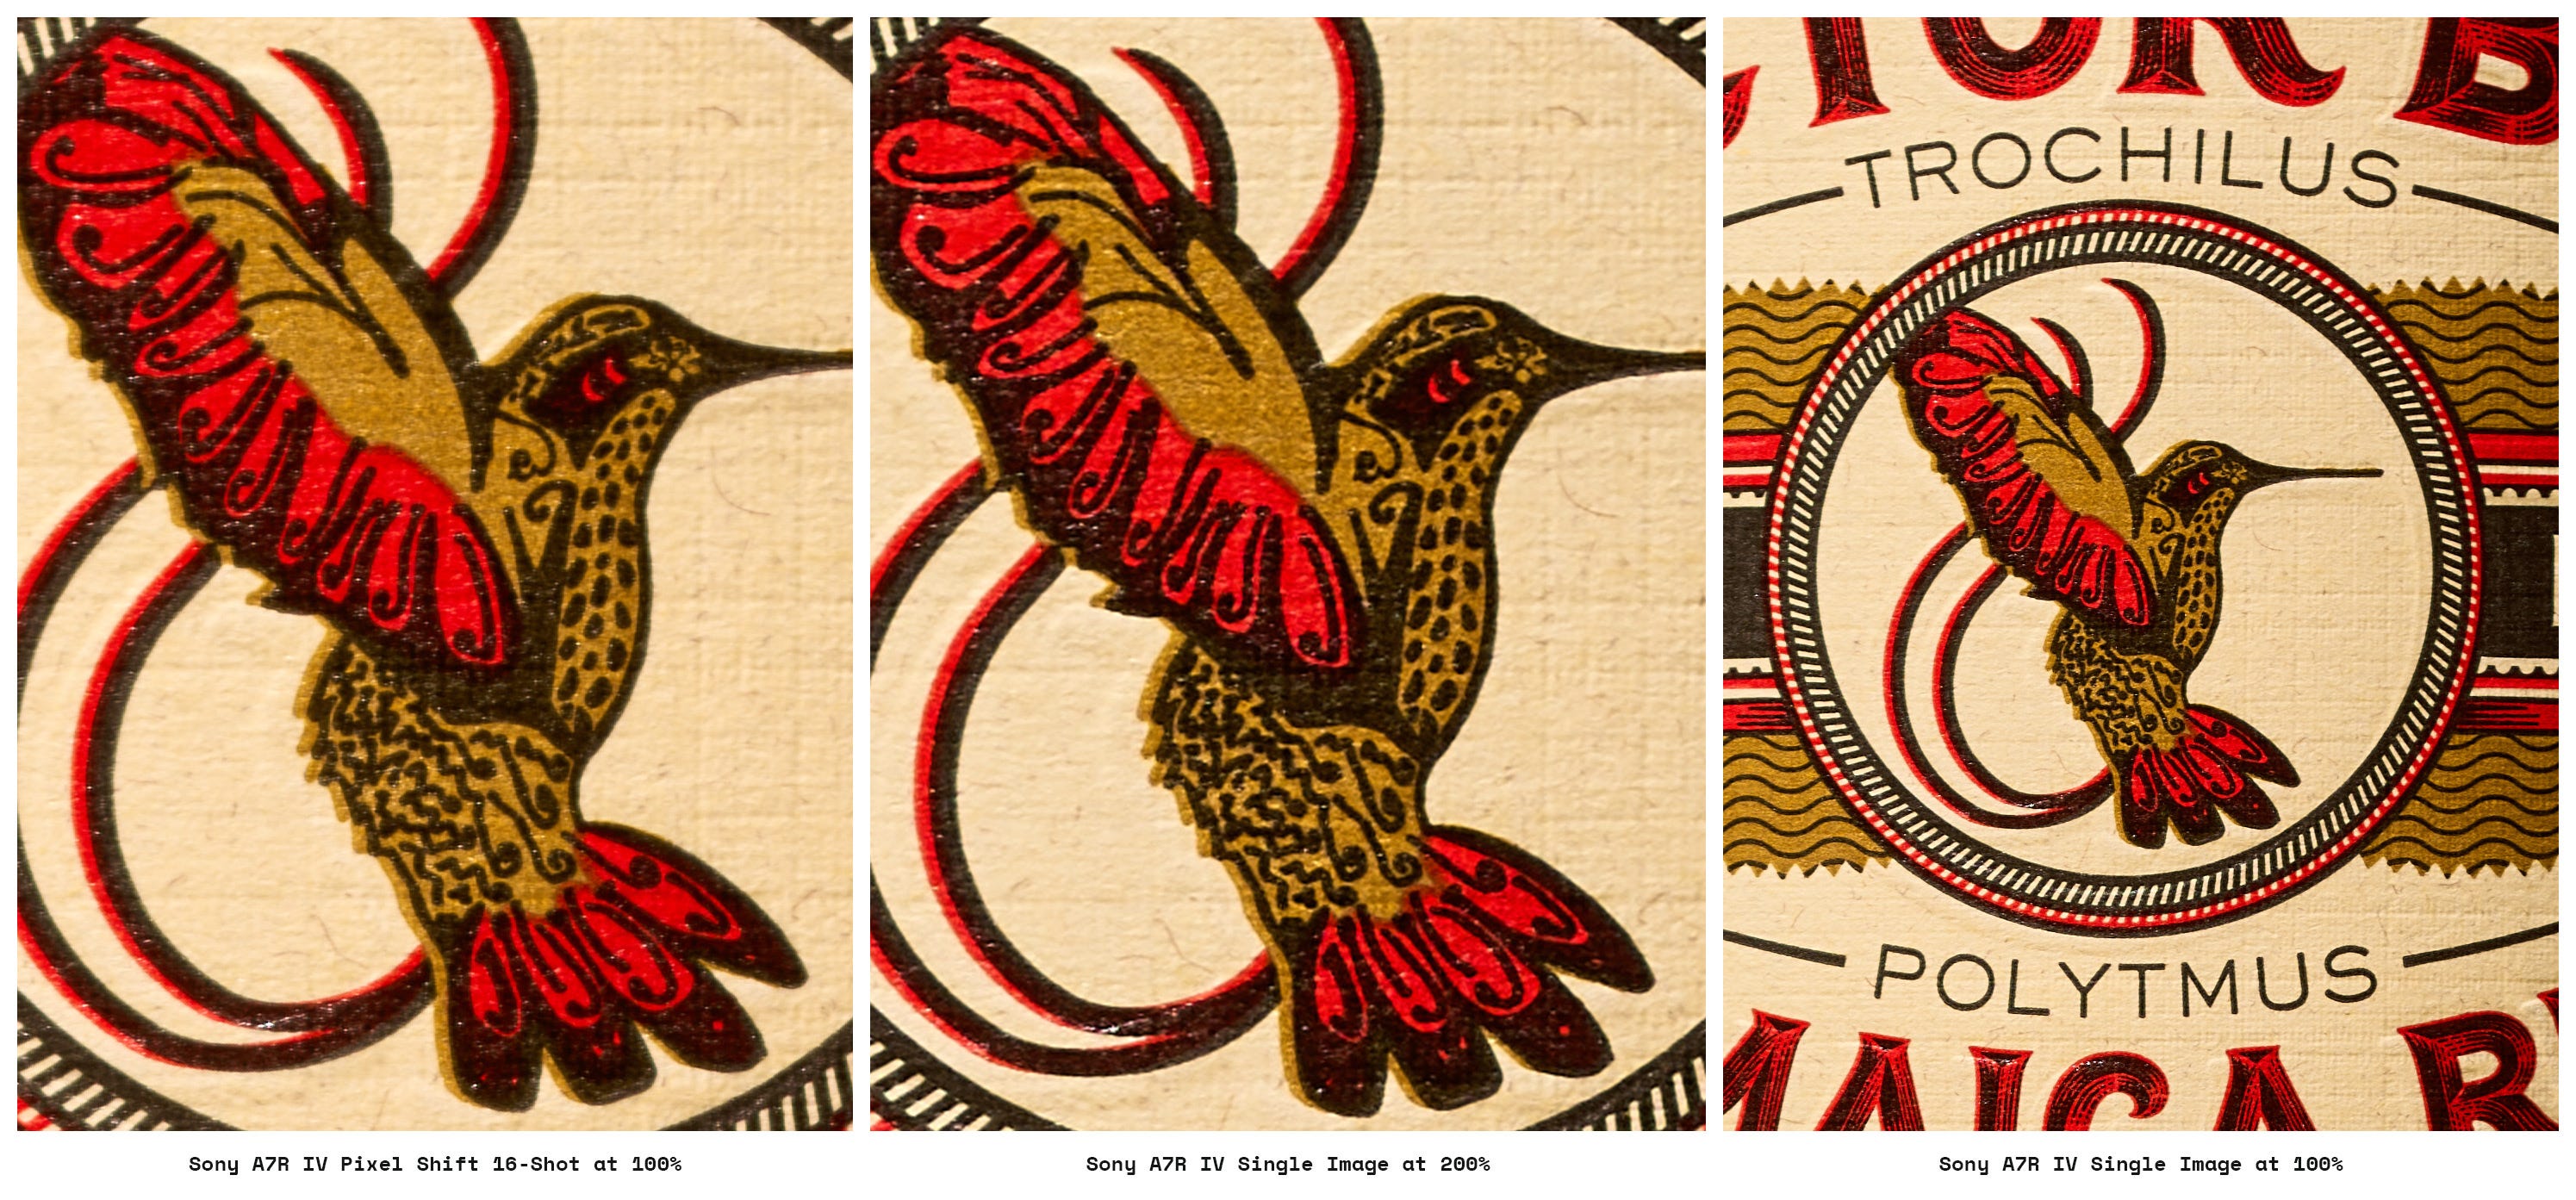
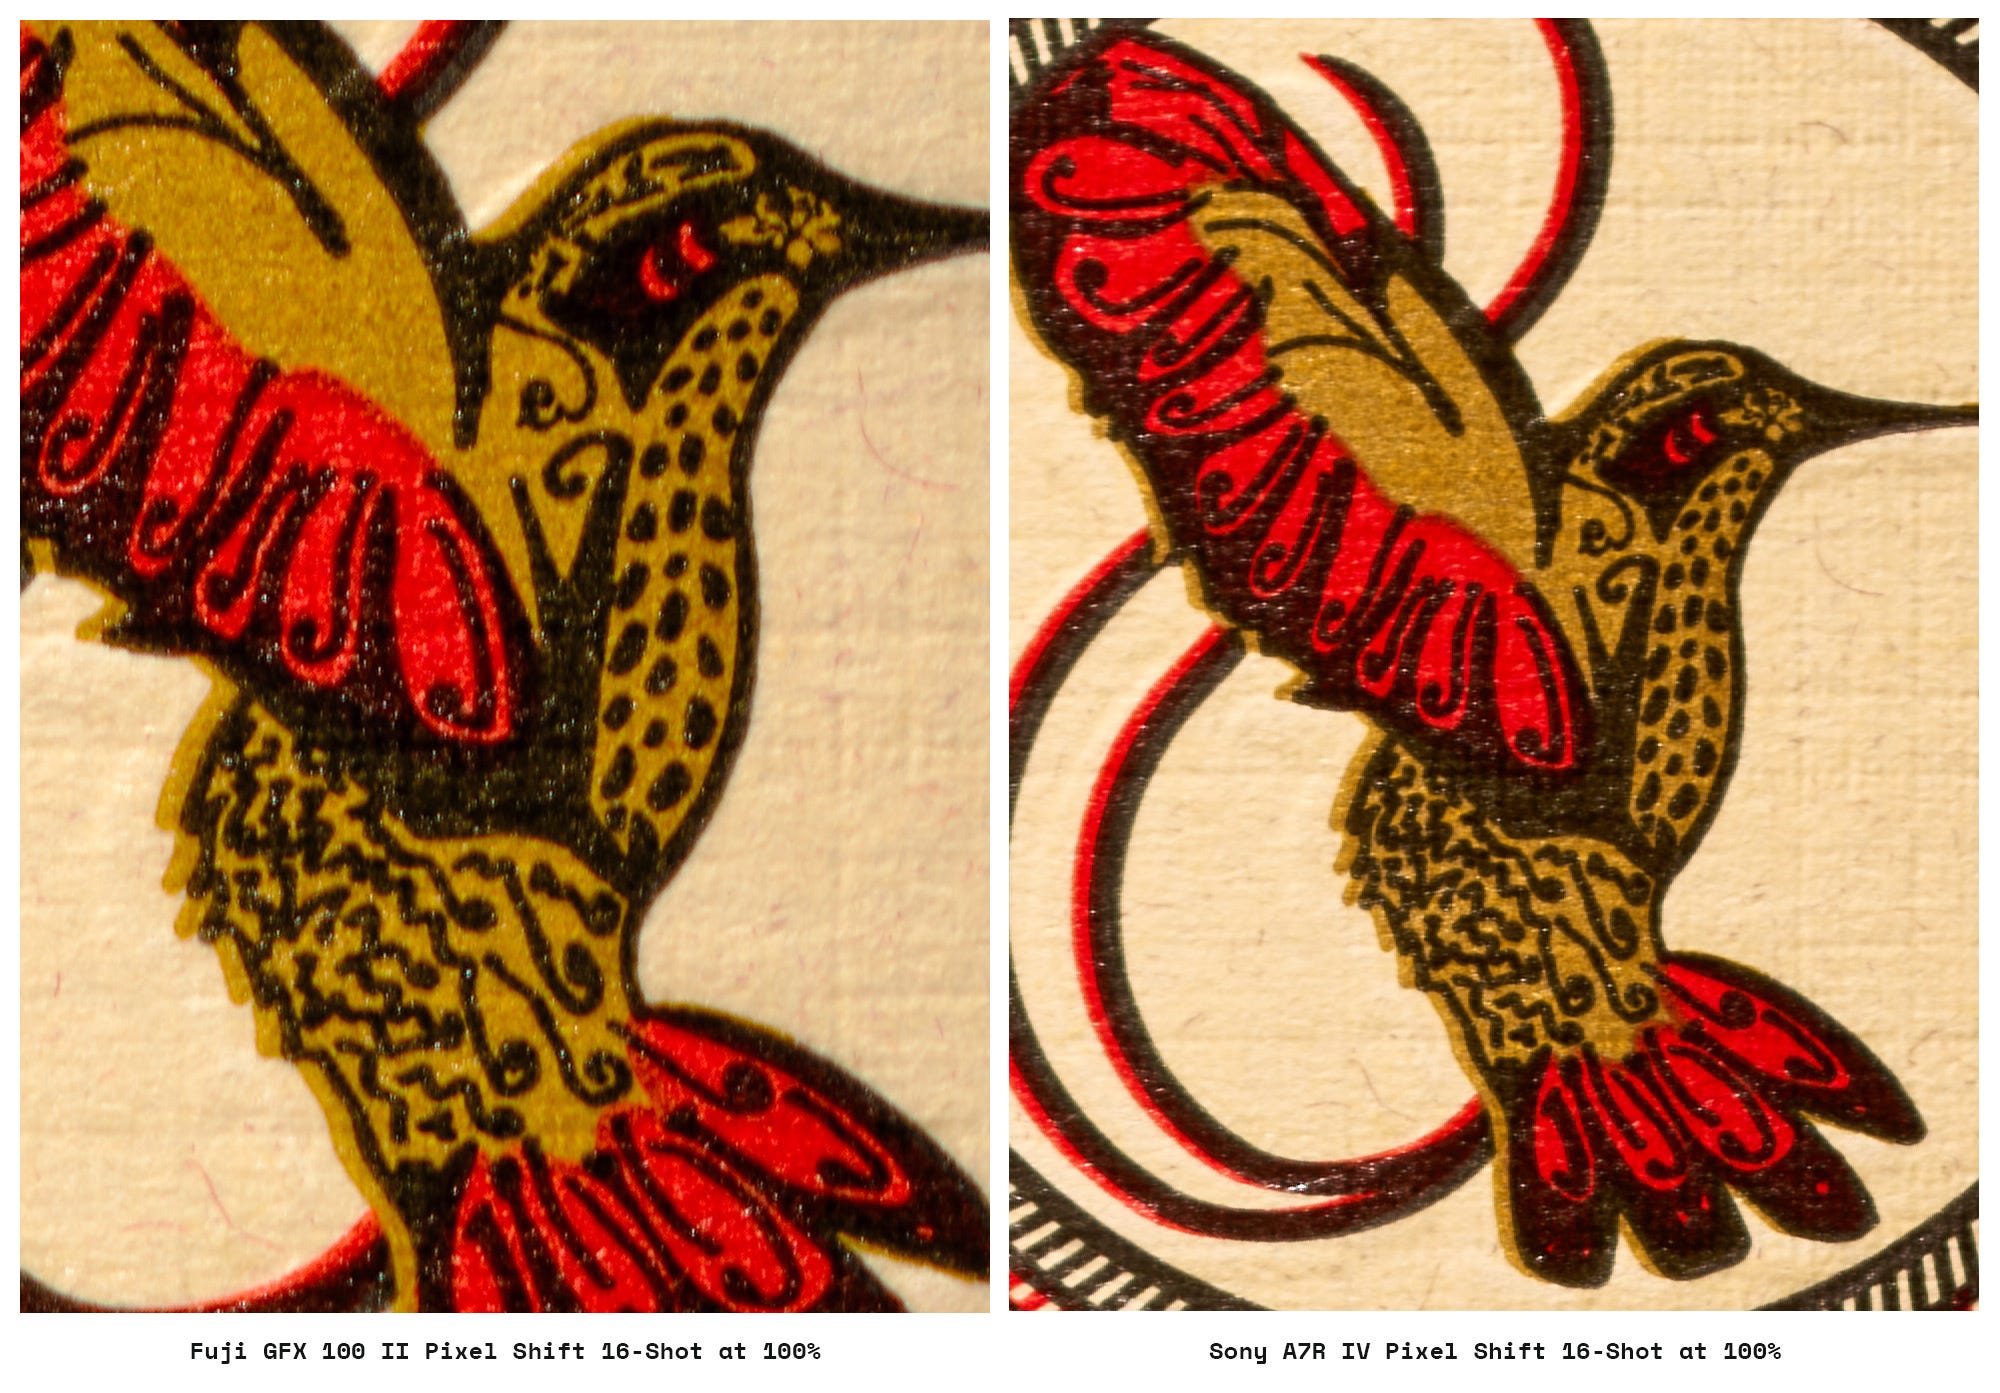
16-Shot pixel shift: 4x the resolution?
This mode tests the absolute limits: 400MP for Fuji vs. 240MP for Sony. In practice, the 16-shot mode seems too difficult to execute for the benefits provided. You are often better off upscaling in Photoshop or using AI sharpening tools (like Topaz or Adobe Super Resolution), which can provide results that meet or exceed 16-shot output without the stability headache.
This process increases pixel count but does not enhance resolving power; it primarily reduces aliasing to allow for cleaner sharpening.
I might try a follow-up with constant lighting to speed up capturing all 16 images, which could resolve the sharpness issue. However, I prefer using flash, and this article is about how pixel shift works in my workflow, not just about testing it.
Fuji 16-shot pixel shift vs its single image
Sony 16-shot pixel shift vs its single image
Fuji 16-shot pixel shift vs Sony 16-shot pixel shift
Setup & workflow
Pixel peeping; not science. Check out Jim Kasson’s blog for technical information.
I choose gear based on my practical needs and preferences, not just technical specs, which is why my gear choices span Sony, Fuji, Mamiya, Cambo, APS-C, full-frame, and cropped medium-format.
Sensor and resolution specifications
Sorry, Substack doesn’t support tables, so here is a long list of specs…
Key spec differences between GFX 100 II & Sony a7R IVa
Fuji has a 1.7x larger sensor and a 41 MP difference, but with different sensor ratios.
GFX cropped at a 3x2 ratio is essentially 91MP vs Sony’s 61 MP
Sony at a 4x3 ratio is essentially 54 MP vs Fuji’s 102 MP
A 160 MP difference for 16-shot pixel shift files at native ratio.
GFX provides deeper color data —16-bit vs. 14-bit.
GFX offers a lower base ISO: 80 vs 100.
Sony has faster mechanical flash sync, 1/250s vs 1/125s
Sony has a faster flash sync speed in PS mode, 1/8s vs 1/2.5s
Capture One supports GFX’s merged pixel shift files natively.
Neither system can merge images in-camera.
Sony a7R IVa specs
Sensor size: Full-frame (35.7 × 23.8 mm)
Sensor ratio: 3x2
Pixel pitch: 3.76μm
Native resolution: 61 MP
Color accuracy pixel shift: 61 MP (4-shot)
High resolution pixel shift: 240 MP (16-shot)
Bit depth: 14-bit
Lowest native ISO: 100
Shutter’s maximum flash sync speed (in Pixel Shift Mode, 14-bit RAW): 1/8s
Sony a7R IVa normal sync speed is 1/250 (with Godox around 1/200)
Merge software: Sony’s Imaging Edge
Capture One Support: No. If you use Capture One, you must export a TIFF from Imaging Edge, which adds a conversion step and increases the file size early in the process. Use PixelShift2DNG as a workaround; it outputs a DNG that Capture One can handle.
Fujifilm GFX 100 II specs
Sensor size: Medium format (43.8 × 32.9 mm)
Sensor ratio: 4x3
Pixel pitch: 3.76μm
Native resolution: 102 MP
Color accuracy pixel shift: 102 MP (4-shot)
High resolution pixel shift: 400 MP (16-shot)
Bit depth: 16-bit
Lowest native ISO: 80, kinda.
Shutter’s maximum flash sync speed (in Pixel Shift Mode, 16-bit RAW): 1/2.5s
GFX 100 ii normal sync speed is 1/125s
Merge software: Fuji’s Pixel Shift Combiner – DNG output
Capture One: Merged DNG file supported
Lightroom (LR & LrC): Merged DNG file supported
Equipment
Camera Support: I used a Titan MK2 Studio Camera Stand for both, which greatly improved stability for the 16-shot captures. Results on a tripod in my studio were basically unusable.
Camera Mount: Both cameras were mounted on a Cambo Actus MV, allowing me to use the same lens on both.
The camera sensor was parallel to the bottle, and a minor lens tilt of around -5º was used to compensate for the upward angle.
Lens Used: Cambo Actar 120mm lens with a 100mm image circle, comfortably covering the longer side of the 43.8mm GFX sensor plus 20mm shifts.
Environment: HVAC was turned off during captures to eliminate all sources of vibration. The modeling lights were also turned off, and the studio was blacked out to prevent light pollution.
Camera settings
Aperture: f/5.6 was used for both to greatly avoid diffraction limits.
This was the only exception I made for this test, as I don’t shoot at f/5.6 for this type of photo. I’m usually shooting at f/8 min. to f/16, but for the diffraction-concerned folks reading this, I opened up the aperture.
ISO: ISO 320 (Sony) and ISO 500 (Fuji) were selected to balance flash power and noise performance (second-highest dynamic range).
Strobe Key Light: Flashpoint AD1200 Pro at 1/2 power (t.1 of 1/600s).
Strobe Back Light: Flashpoint AD200 Pro at 1/8 power with eVOLV 200 Round Flash Head (t.1 of 1/3220s)
Image stabilization: Off (only option available)
ISO settings rationale
Why not shoot at the lowest native ISO?
Shooting at the lowest ISO requires more light, which slows the flash recycle time and can become an issue in the 16-shot pixel shift mode. I tend to use a lot of light in my standard setups because I use grids, a polarizing gel on the light, a CPL on the lens, and I often shoot around f/8 to f/13 for the depth-of-field I prefer. Even with 1200 watts, I work at half to full power. I'm still using the ISO setting with the next-best dynamic range, which for the A7R IVa is ISO 320 and for the GFX 100 II is ISO 500.
Tips for using strobes with pixel shift
Consider using continuous light if possible. I prefer flash
The main drawback of using strobes with pixel shift is the need for a slow shutter speed, since both systems default to the electronic shutter. This increases the chance of banding (though I have not personally encountered this issue with my setup).
Shutter Sync Speeds: The requirement to use the electronic shutter restricts the flash sync speeds:
Sony a7R IV: 1/8s (with 14-bit RAW capture).
Fuji GFX 100 II: 1/2.5s (with 16-bit RAW capture).
Flash Recycling: When shooting with flash, the delay between shots (a menu option) is essential to allow the strobe to recharge. The 16-shot sequence, especially at half to full power, required a 2s delay between frames to ensure the flash can keep recharging for all 16 shots. The 4-shot pixel shift sequence could be performed more quickly since the flash kept pace with all four consecutive shots.